Getting Started In Screenprinting Using Paper Stencils
Screenprinting is the approach which requires making use of quite slim and even layers of color on to a area (which could be paper, cloth, wood, metallic – quite considerably anything flat). The color is pushed via a fine mesh screen, which is stretched above a square or rectangular body. An image is built by masking parts of the display to end the colour from likely as a result of those elements of the display screen. Such a mask can be manufactured in a wide variety of means. A mask can be uncovered to a monitor which has been coated in a mild delicate emulsion, or a painterly mask can be used freehand by the artist working with drawing fluid. On the other hand as a newcomer to this process I have savored doing work with straightforward paper stencils for making a mask. This post provides some tips on how to get began with screenprint, making use of fundamental equipment which is quick to use at house or in a modest functioning spot.
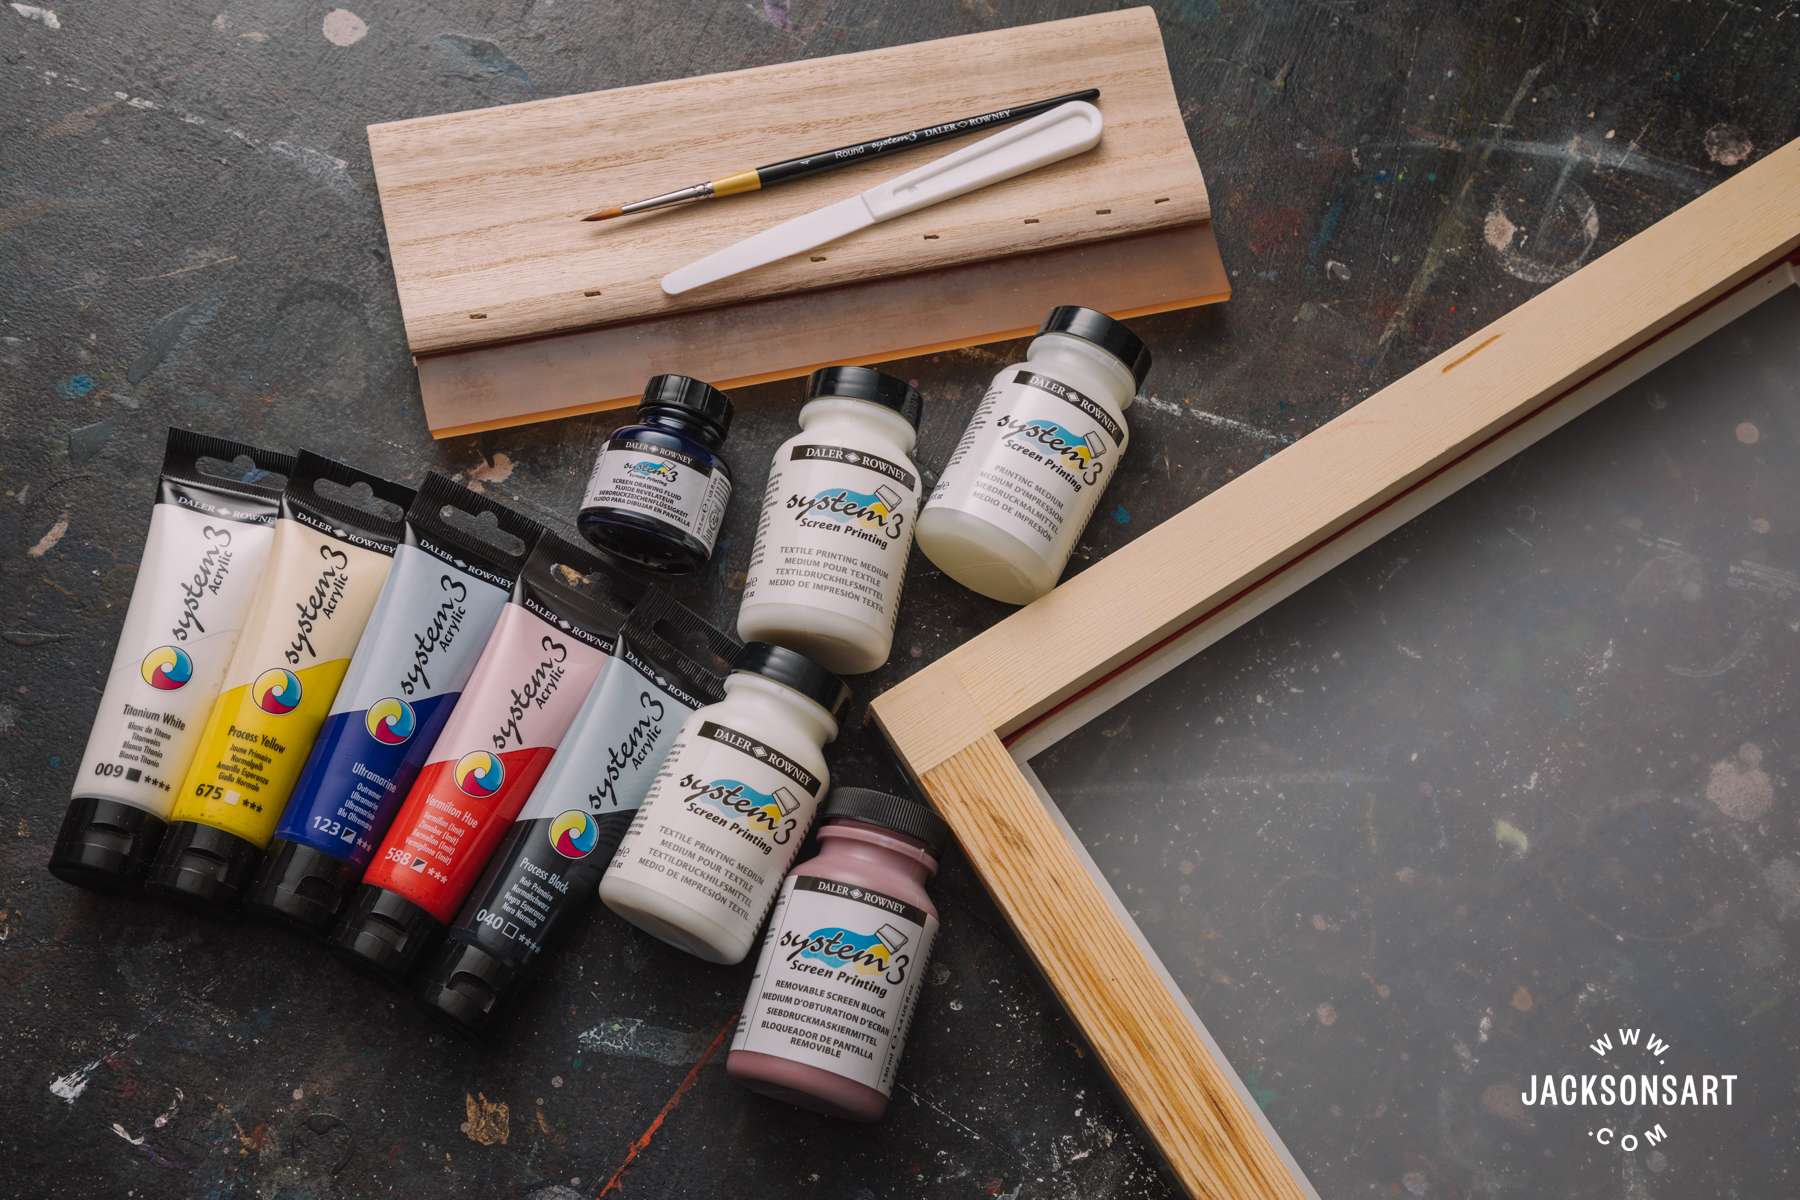
Contents of the Daler Rowney Screenprinting Beginners’ established
Advisable Materials for Screenprinting
Daler Rowney Display screen Printing Set
Extra Monitor Printing Medium (optional)
Speedball Hinge Clamps
A board to screw your hinge clamps to (Plywood or MDF)
Newsprint
Scalpel
Chopping Mat
Paper to print on to (I employed Fabriano Rosaspina but you can use any paper of close to 190gsm or additional)
Pots with airtight lids
Brown Parcel Tape
Pencil (to attract on to newsprint with)
Apron
Masking Tape
Smaller items of card (mountboard offcuts are perfect if you have any)
You will also need somewhere to place the prints to dry – a very clear table leading or a string hung up with pegs is great, if you do not have a printmaker’s drying rack.
The Daler Rowney Screenprinting Beginner’s established is a great investment if you want to test the approach at household or in your studio with out needing to make investments in a vacuum table or carousel. In the set you will get a excellent high quality screen and squeegee together with a primary color set of acrylics, screenprint medium for cloth and paper, and a bottle of drawing fluid. You also get a durable plastic palette knife, which is preferable to use with the monitor to a metal palette knife which is additional possible to tear a hole in the screen.
In advance of you start off, I recommend that you get the time to utilize a couple of coats of yacht varnish to your squeegee manage and the frame of your display screen. This is because they are manufactured from uncoated wooden, and if you get to a point of screenprinting often, frequent washing of your products with water could eventually trigger untimely wearing of the wooden. The yacht varnish will assist prolong the lifespan of the squeegee and the display screen.
In addition to the screenprinting set, Speedball’s screenprinting clamps, and a strong board you can use as a screenprinting desk are two other items of equipment well worth investing in. The board can just be any piece of primed or coated MDF or plywood that you can wipe damp paint from, that is a few centimetres greater than your screen (at the very least). If you have a get the job done bench in your studio that you never come to feel too valuable about that has a clean surface, you could simply use this, so extensive as you don’t mind screwing the clamps into the best of it! The clamps really should be about 10cm in from possibly facet of the display screen and parallel to a person a different. If you have the indicates to chisel a sq. into your board so the lower portion of the grip sits degree with the area of the board, this would support to maximise the printing region of the screen, but it is not necessary.
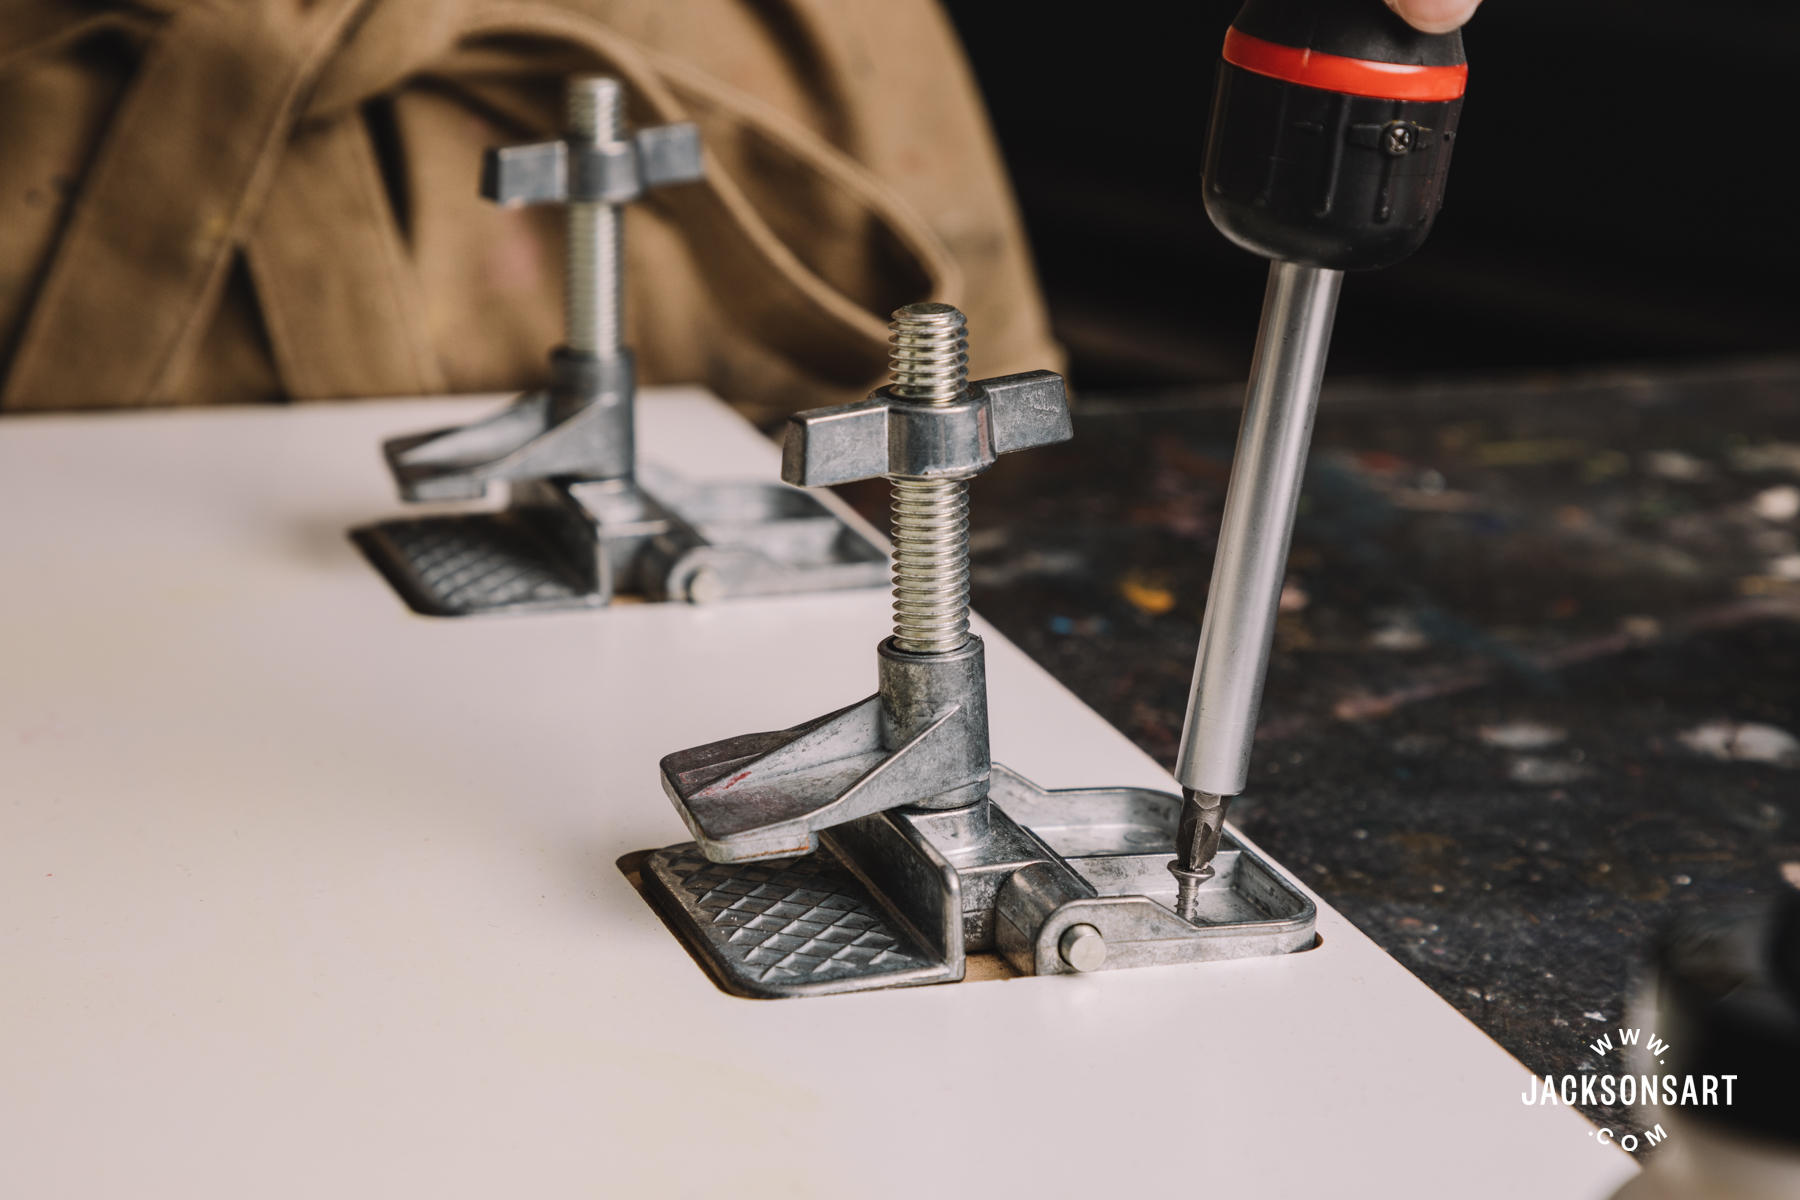
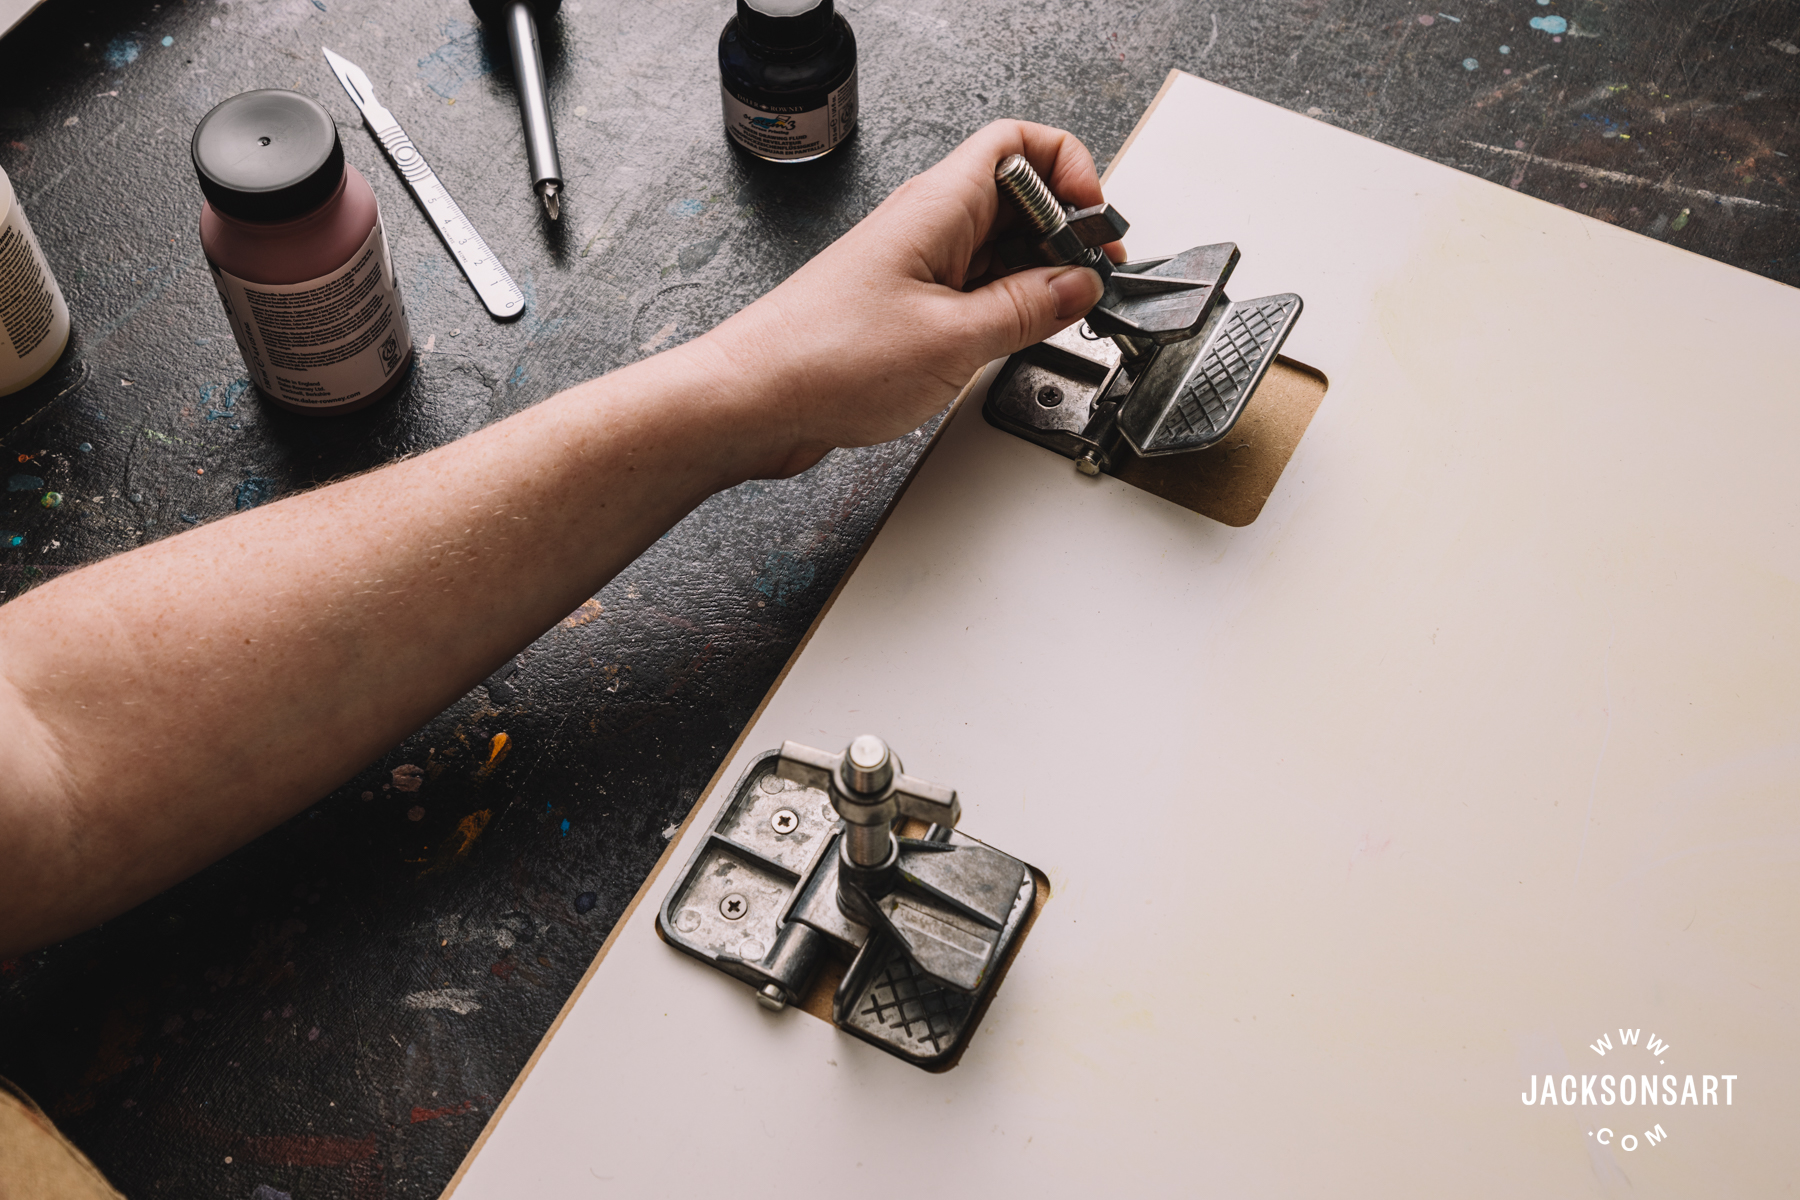
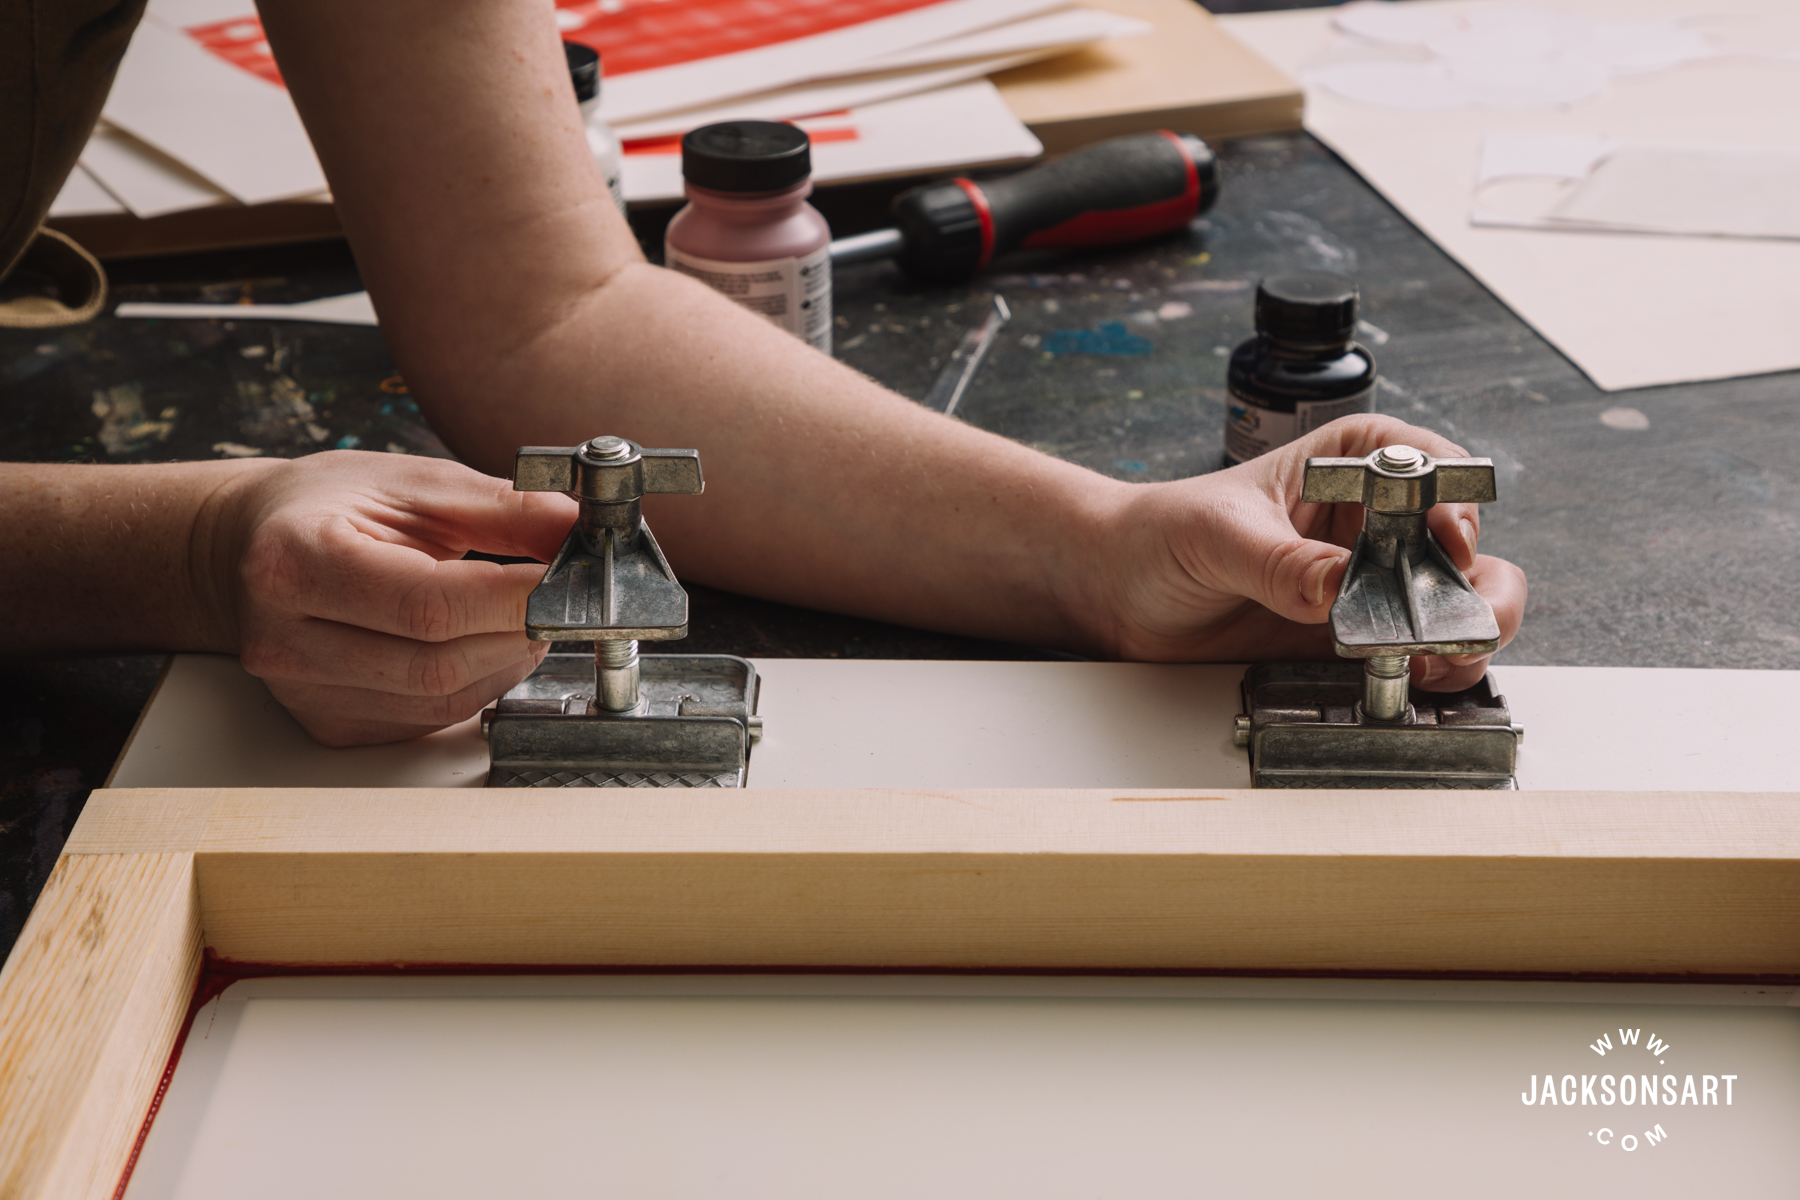
After your clamps are in area you can set your display screen in location to make your screenprinting table.
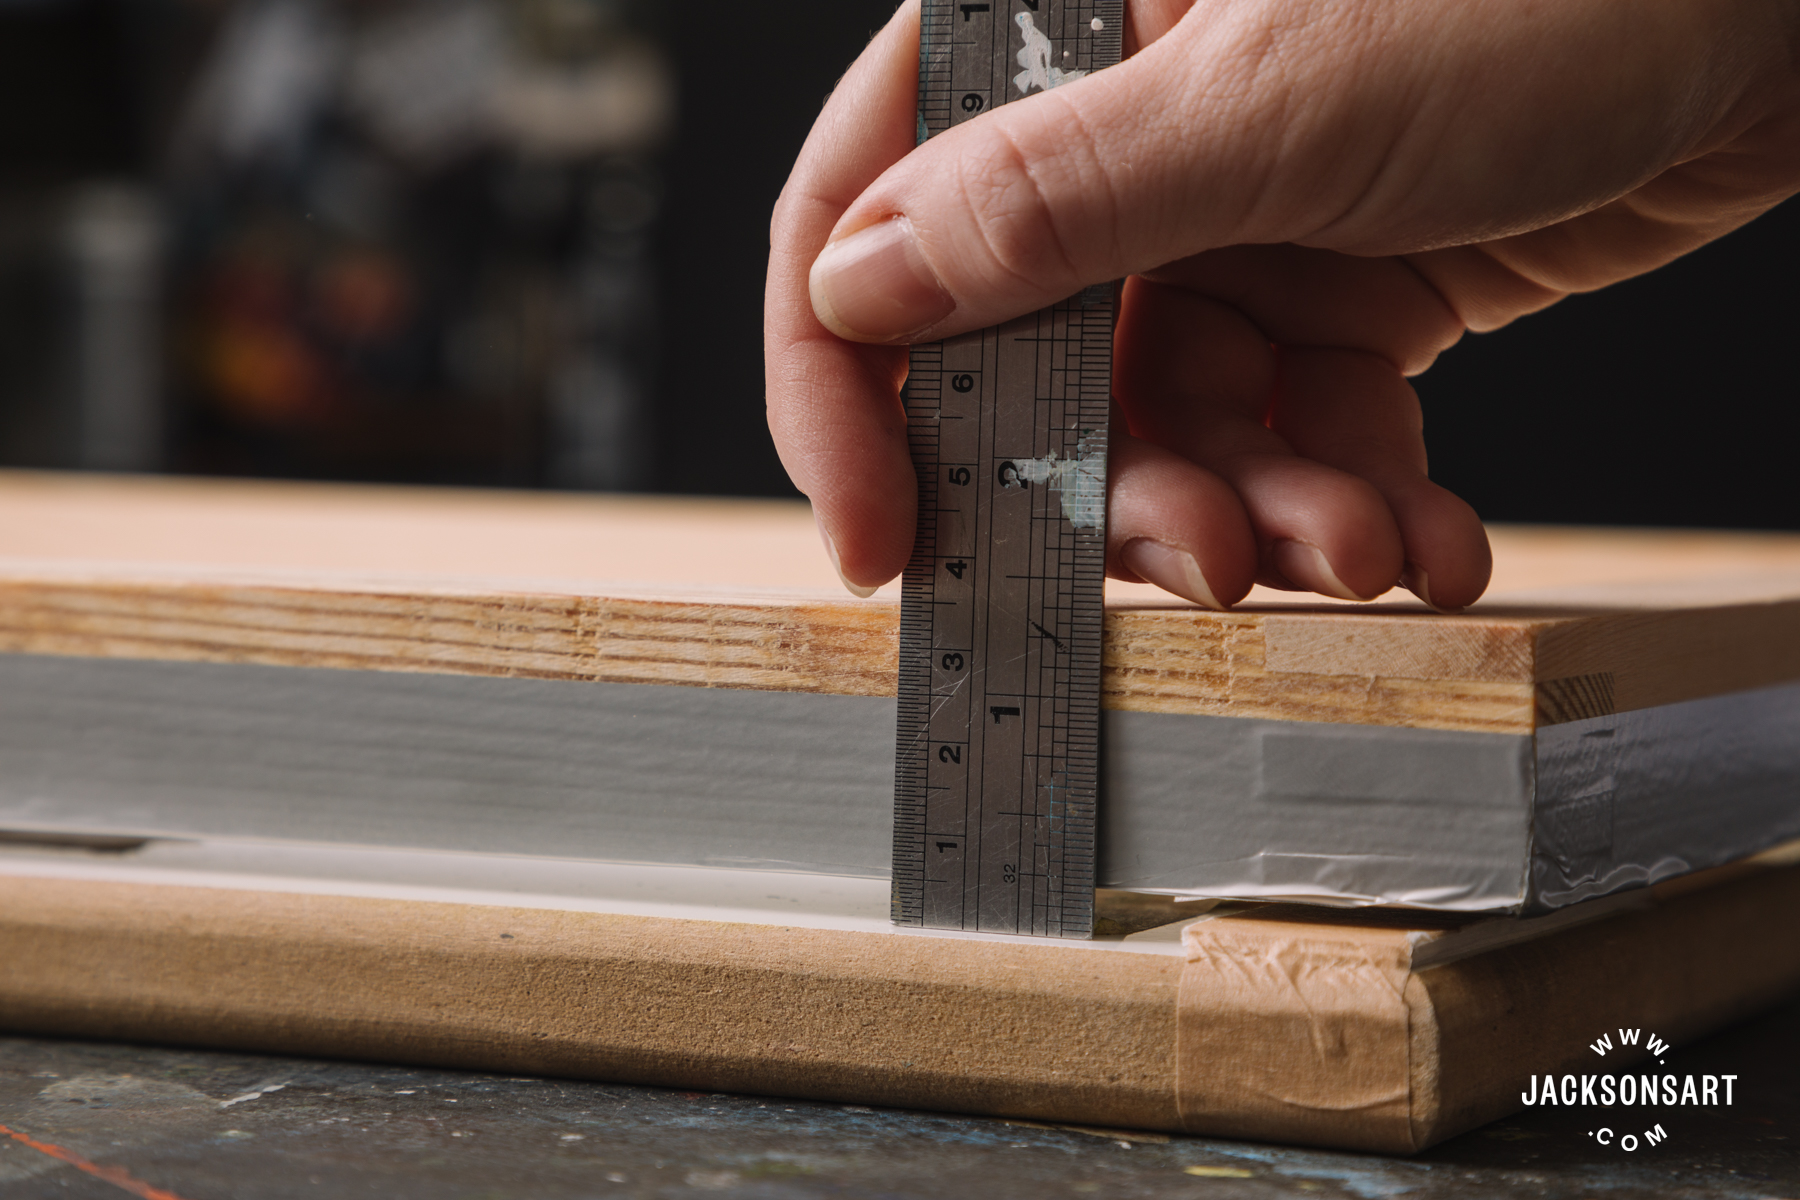
Measuring the gap amongst the screen and the board – this hole needs to be the same distance at both equally ends of the screen to reach a wonderful even print. You may possibly want to tape an offcut of mountboard at the reverse conclude of the clamps to obtain this.
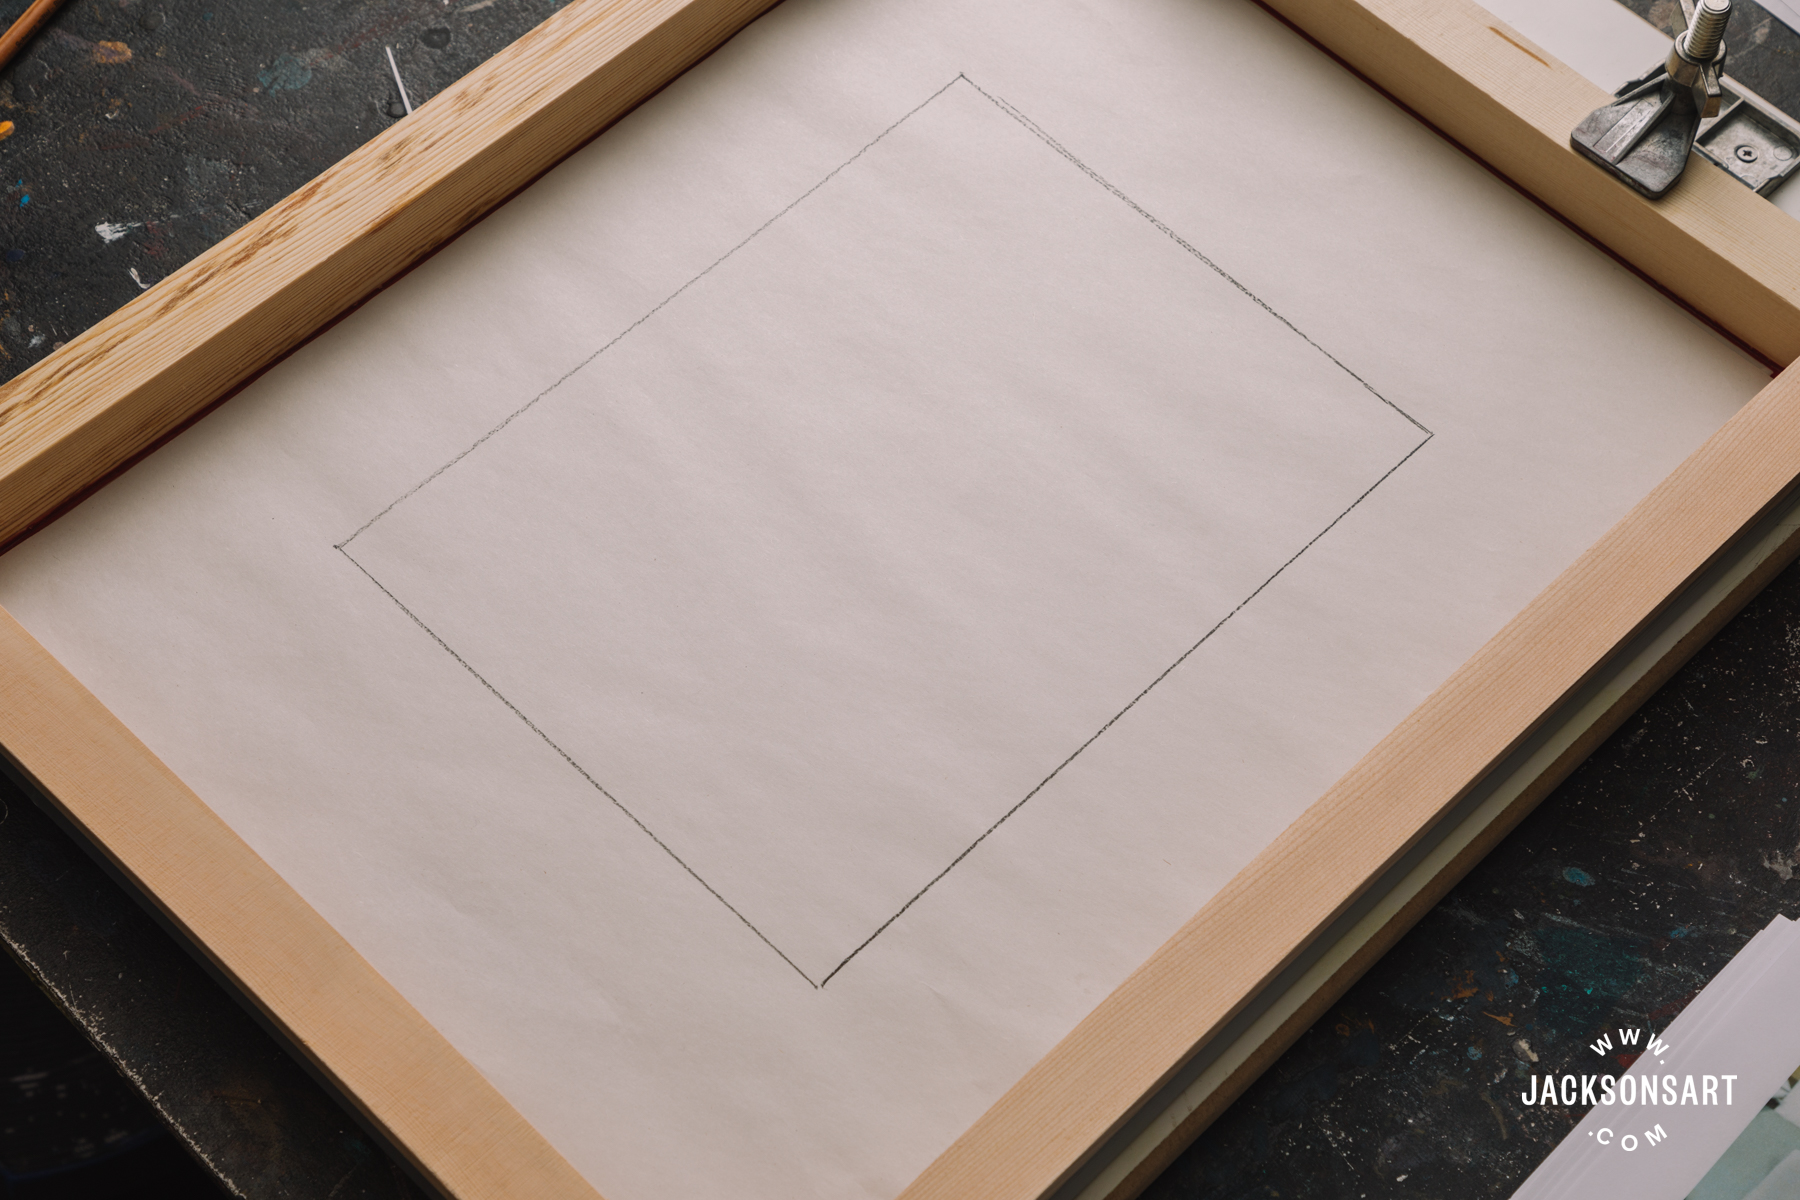
When earning a screenprint, you can not pull a print that is the exact dimensions as your display. This is mainly because pulling a print entails a downwards and forwards pressure with your squeegee, which pushes the display down to the floor you are printing on. As the frame holds the monitor taut, there will always be a border all-around the inside edge of the monitor that will not make the appropriate sum of make contact with desired with the paper for a sucessful print. When you are commencing out, I would normally endorse starting off with a modest picture as they are less difficult to print, and then as you improve your printing approach, you can consider about building much larger photos. The rectangle I have drawn on this piece of newsprint cut to the exact measurement as the display screen is an sign of the sort of dimension of graphic I would recommend you begin with it’s also the dimension of the impression I built for this article. Check out to preserve your impression/printing spot as central on your display screen as possible.
Newsprint is the perfect stencilling product for screenprint. It is slim but robust sufficient to withstand the paint/ink, and when it is used as a stencil in screenprint it typically sticks with simplicity to the display screen, permitting you to use the exact stencil for a variety of prints – a limited version, if you will! It is flawlessly typical for it to get a couple of makes an attempt just before you get the method of pulling a print suitable, so it’s normally well worth printing a variety of photos in scenario subsequent layers of colour really do not pretty go to system.
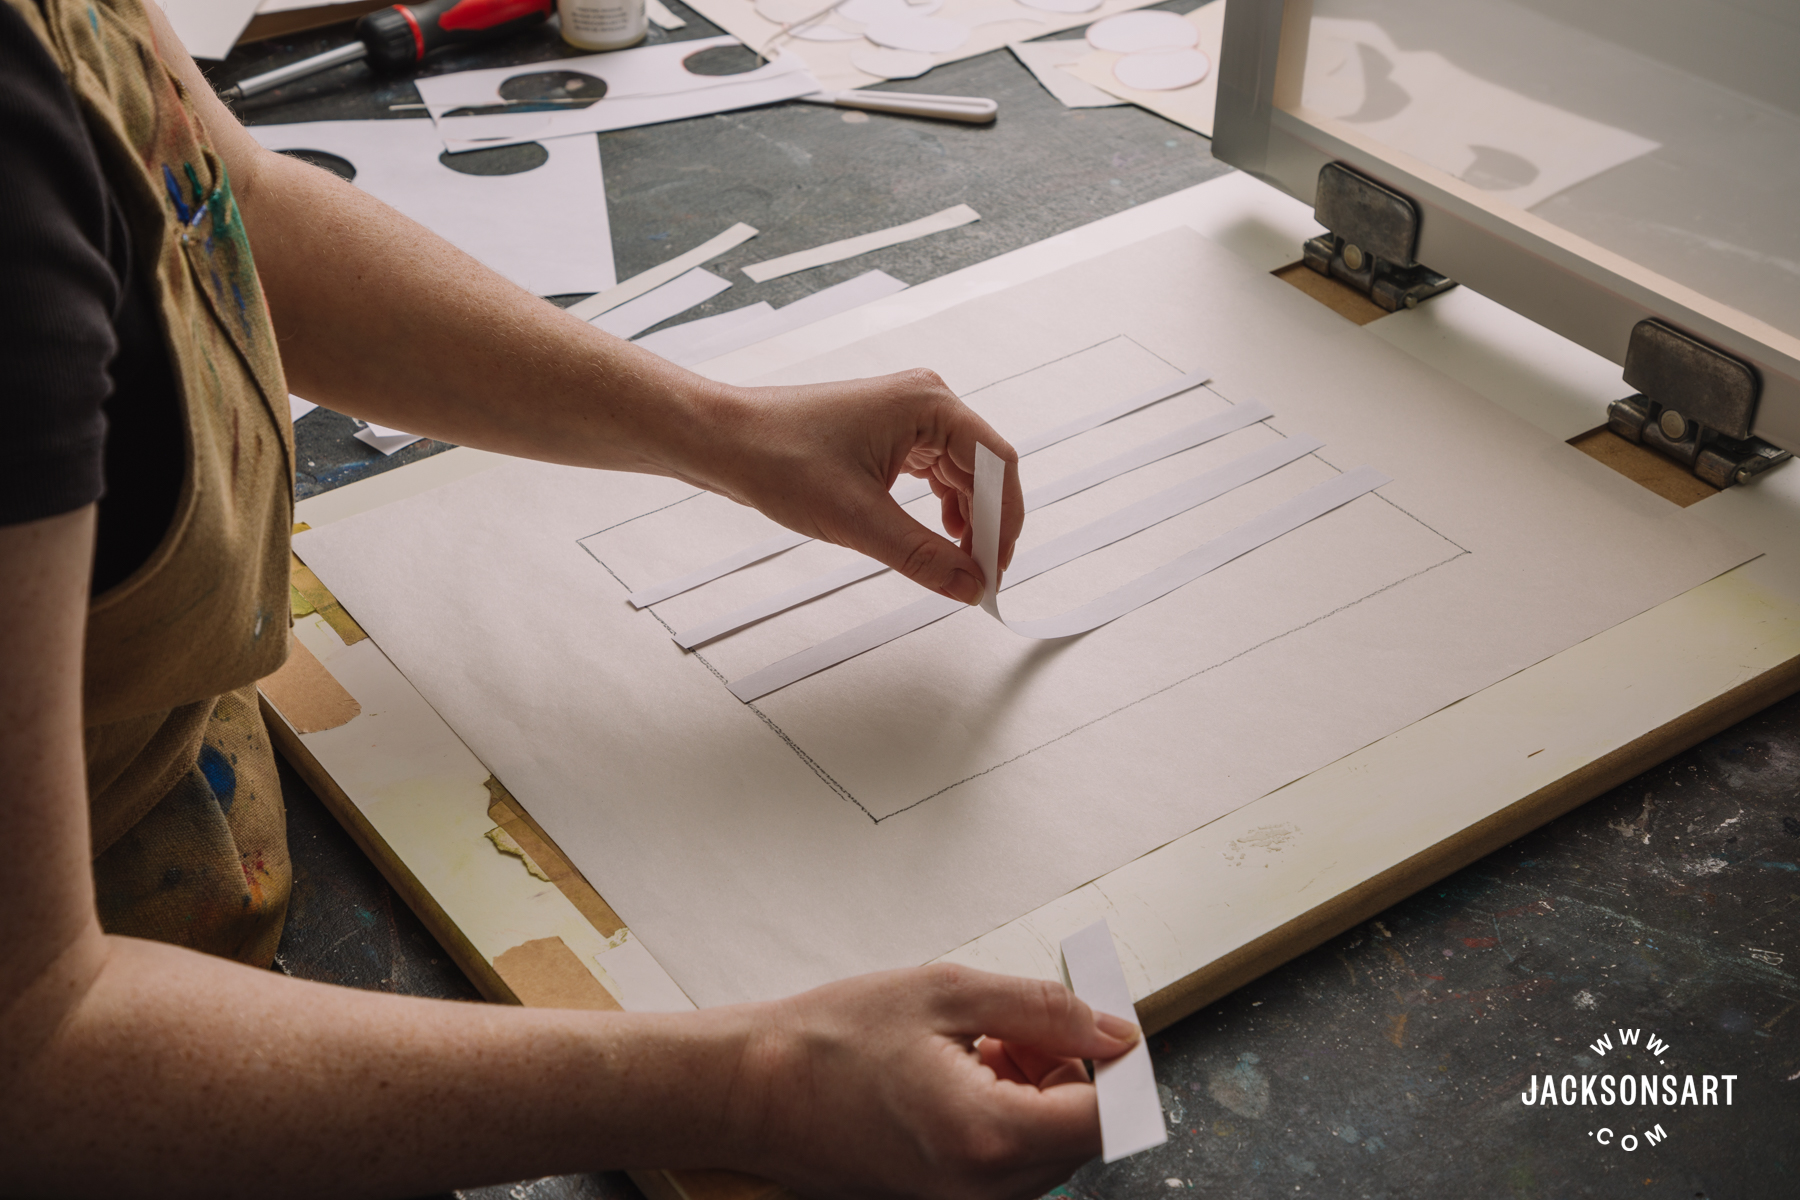
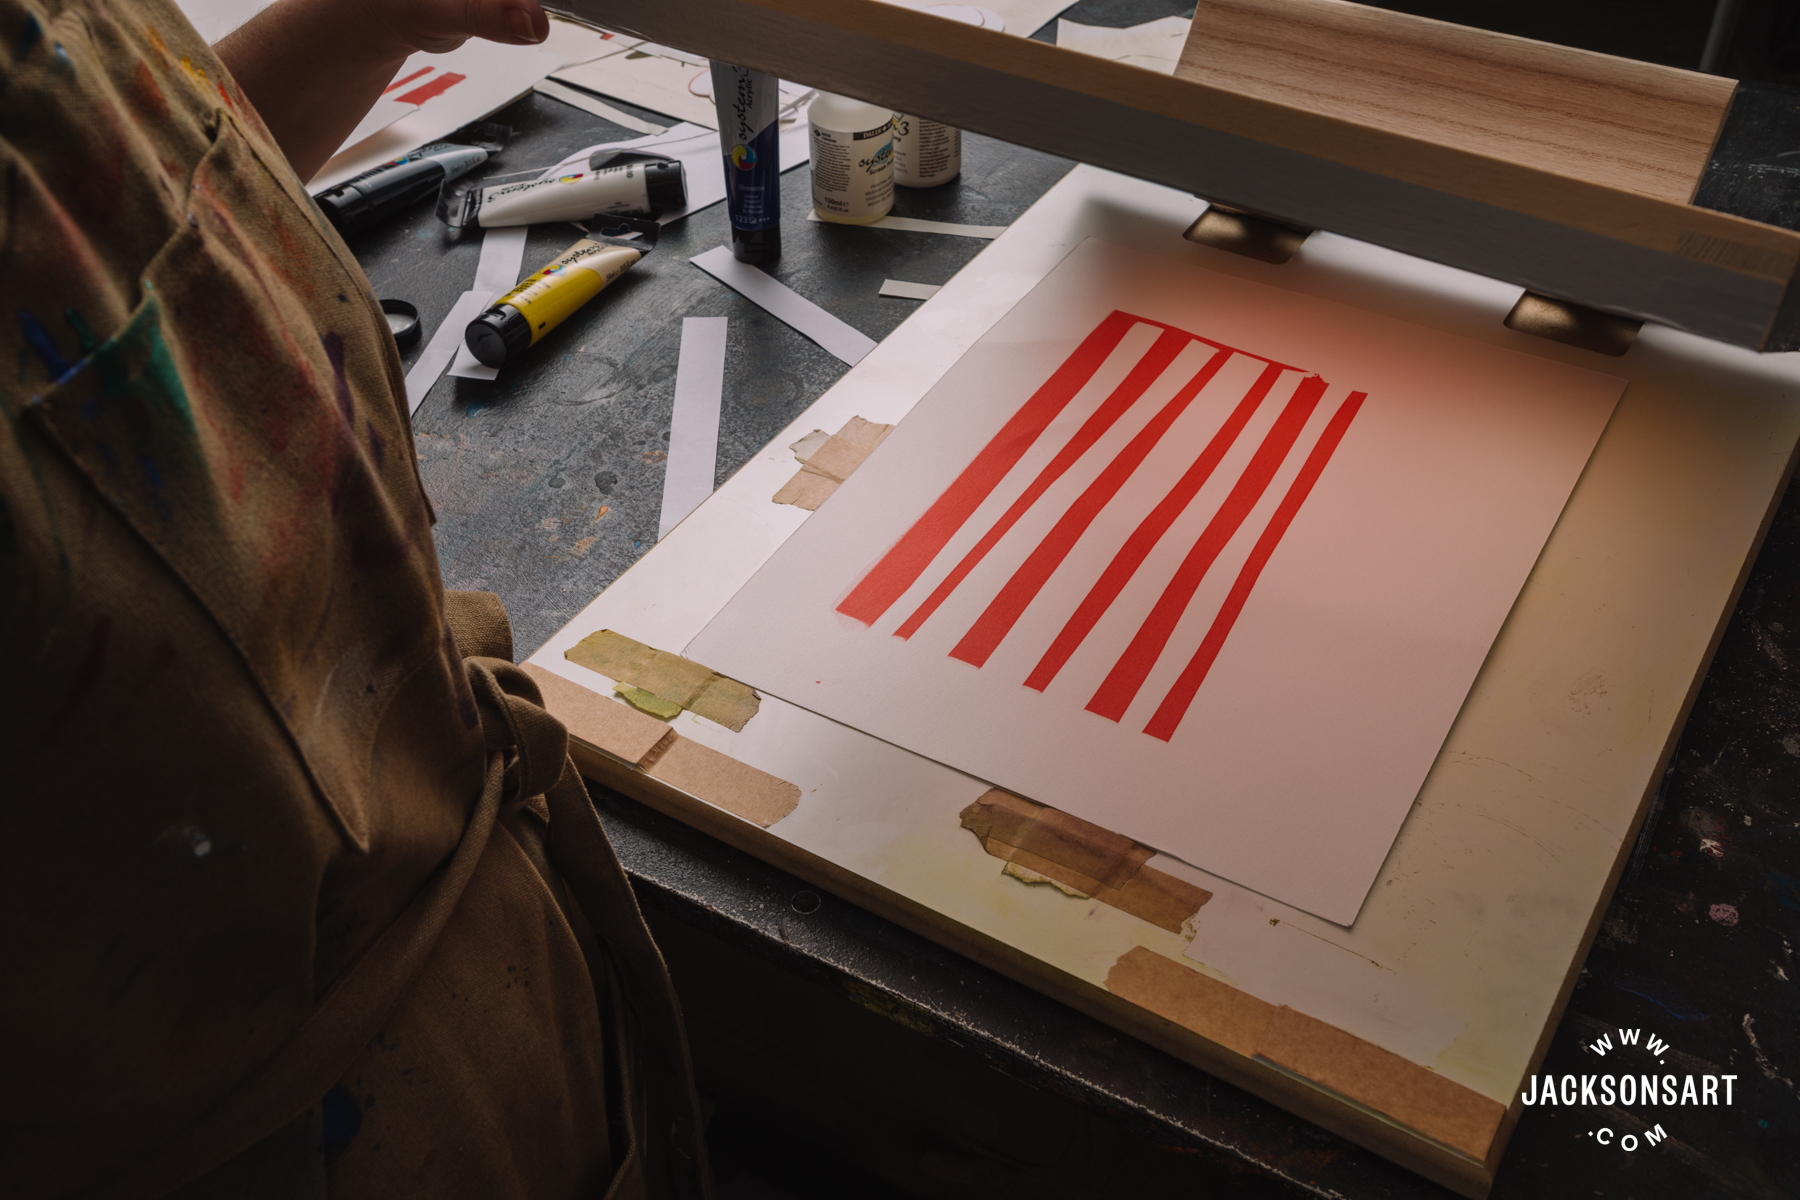
You can then begin to slash your to start with stencil from the sheet of newsprint. I wished to print a very simple however everyday living of oranges on a gingham table fabric in a variety of layers, so I commenced by chopping horizontal stripes throughout the table space of the impression applying a craft knife.
Once I experienced carried out this I slash my printing paper to size. Fabriano Rosaspina is my paper of preference as it has a great body weight to it which indicates it does not wrinkle when printed on to. You could use any other rather weighty printmaking paper or cartridge paper (190gsm+, and sleek). I cut the Rosaspina to the very same sizing as the monitor/piece of newsprint I applied for my first stencil.
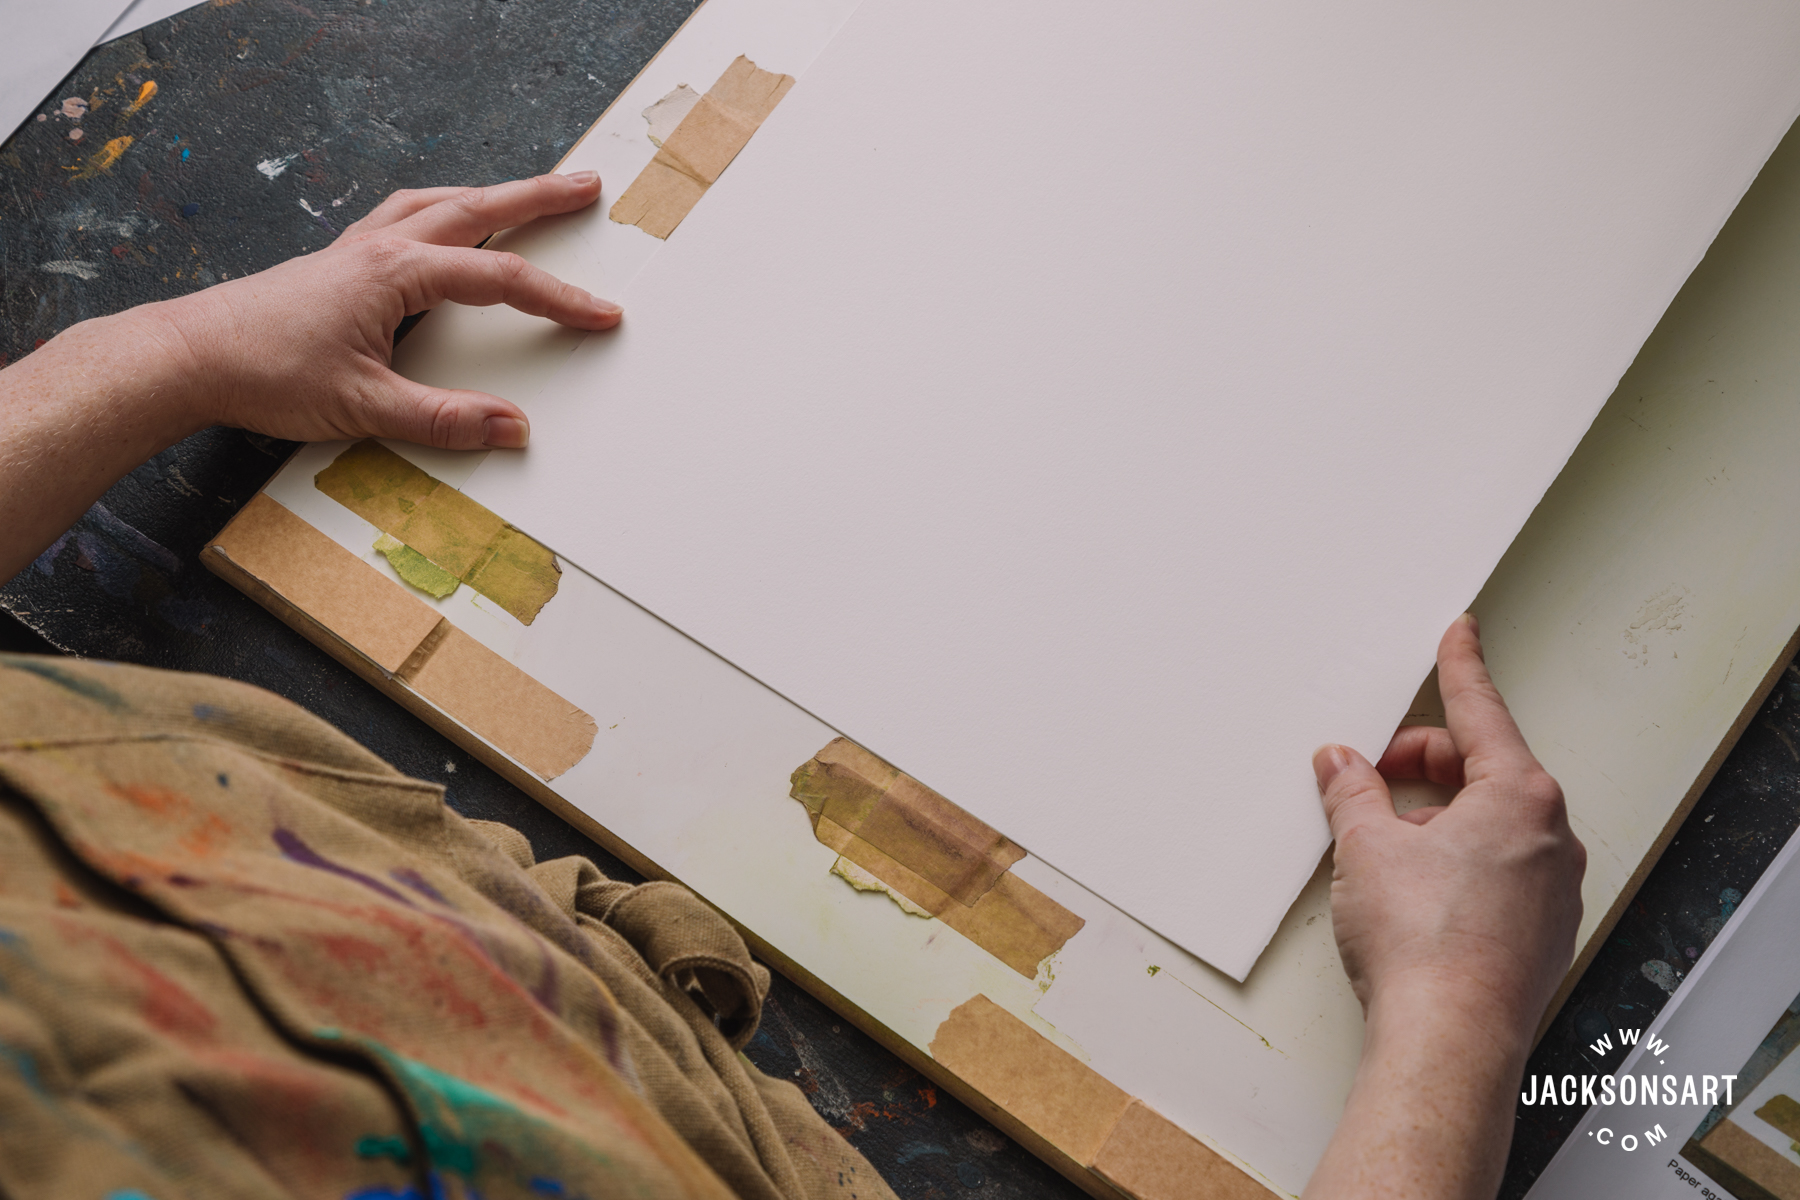
You’ll then will need to tape some registration guides to your board. There would preferably be just one to guideline the duration of your paper together 1 facet, and then yet another to tutorial the base edge of your paper. A mountboard offcut or a piece of cardboard is fantastic for this, taped down with masking tape. By guaranteeing your paper is put versus these two guides your printed image will be positioned in the exact same put on each sheet, which will in flip ensure accurate registration for subsequent levels of color.
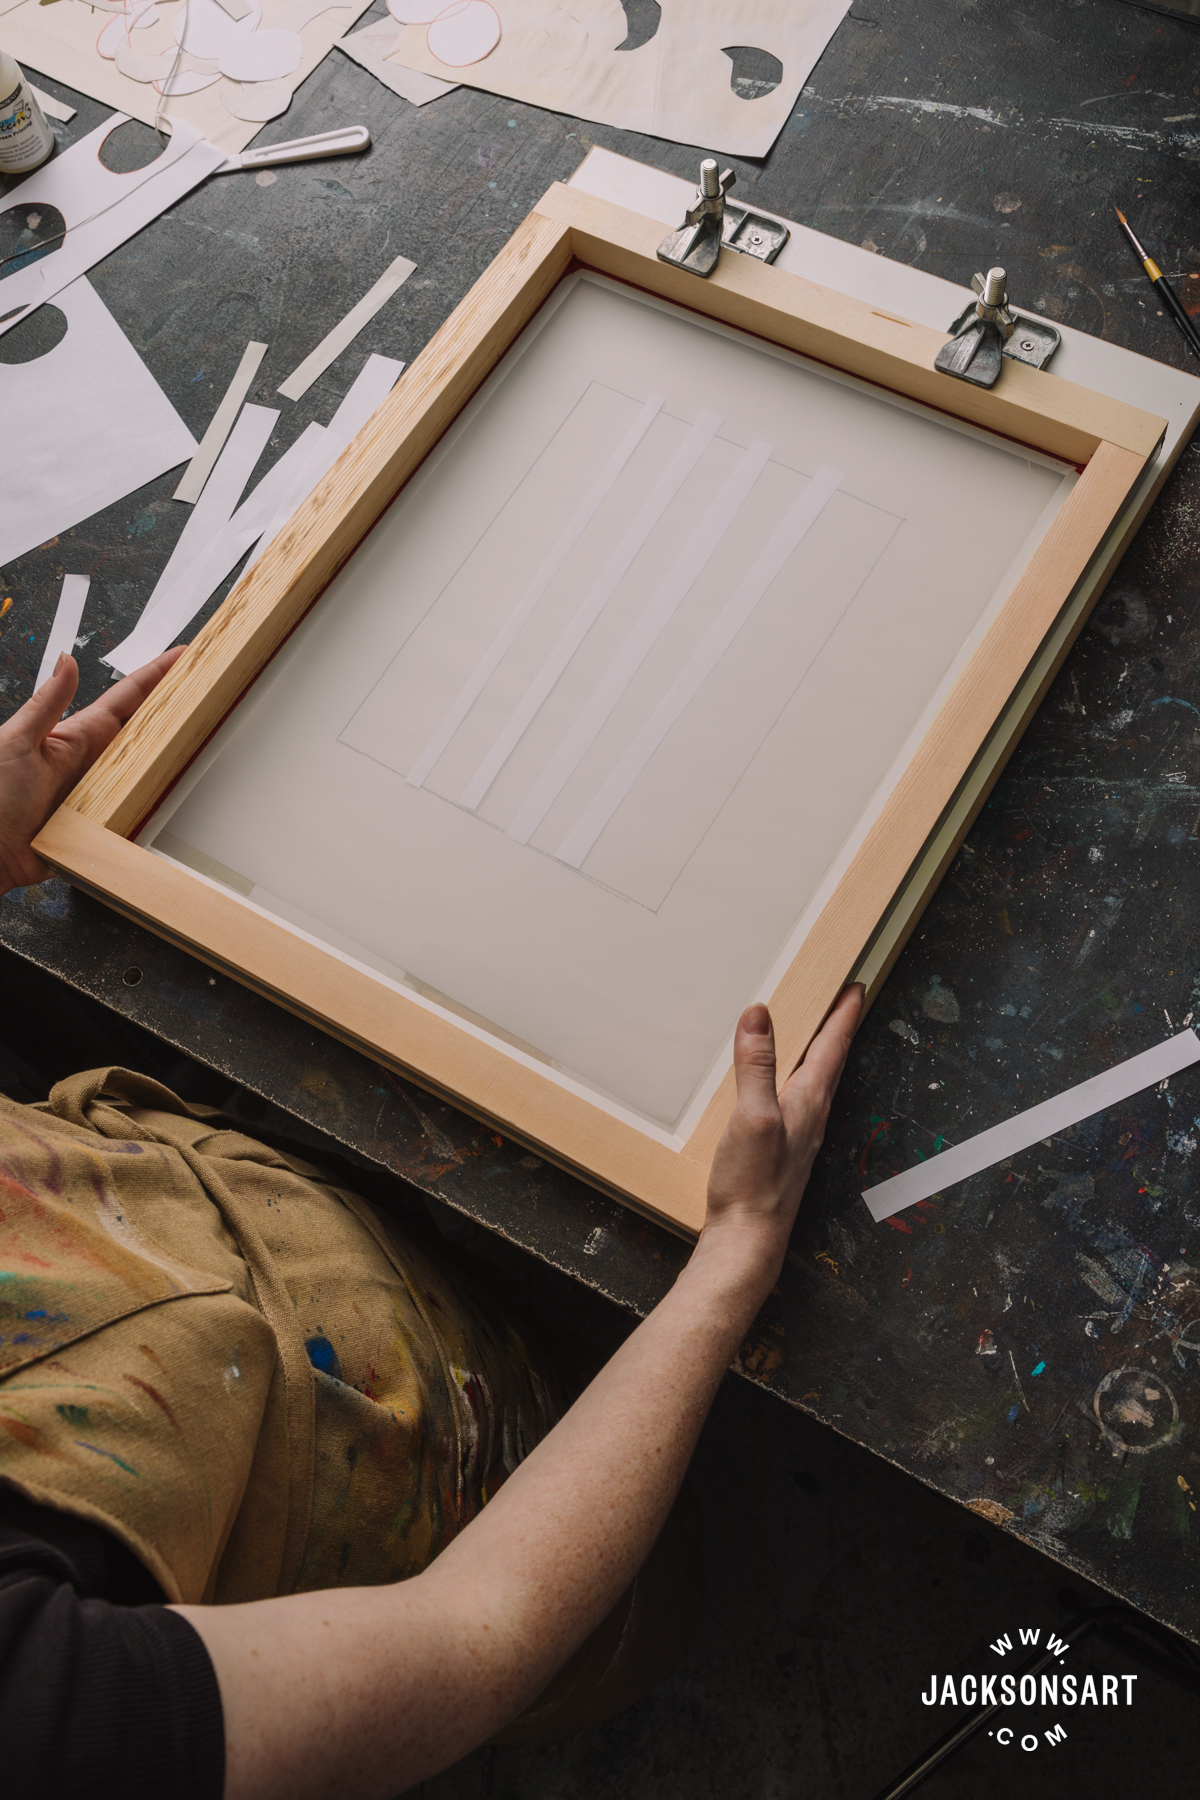
Put your initially sheet of paper to print on within just your guides, and then set your to start with stencil on top rated of this. Your may choose to print on a sheet of newsprint or a scrap piece of paper very first, so you can see if the stencil is effective and the printed layer seems how you would like it to.
You can then carry your monitor down on to your stencil and paper.
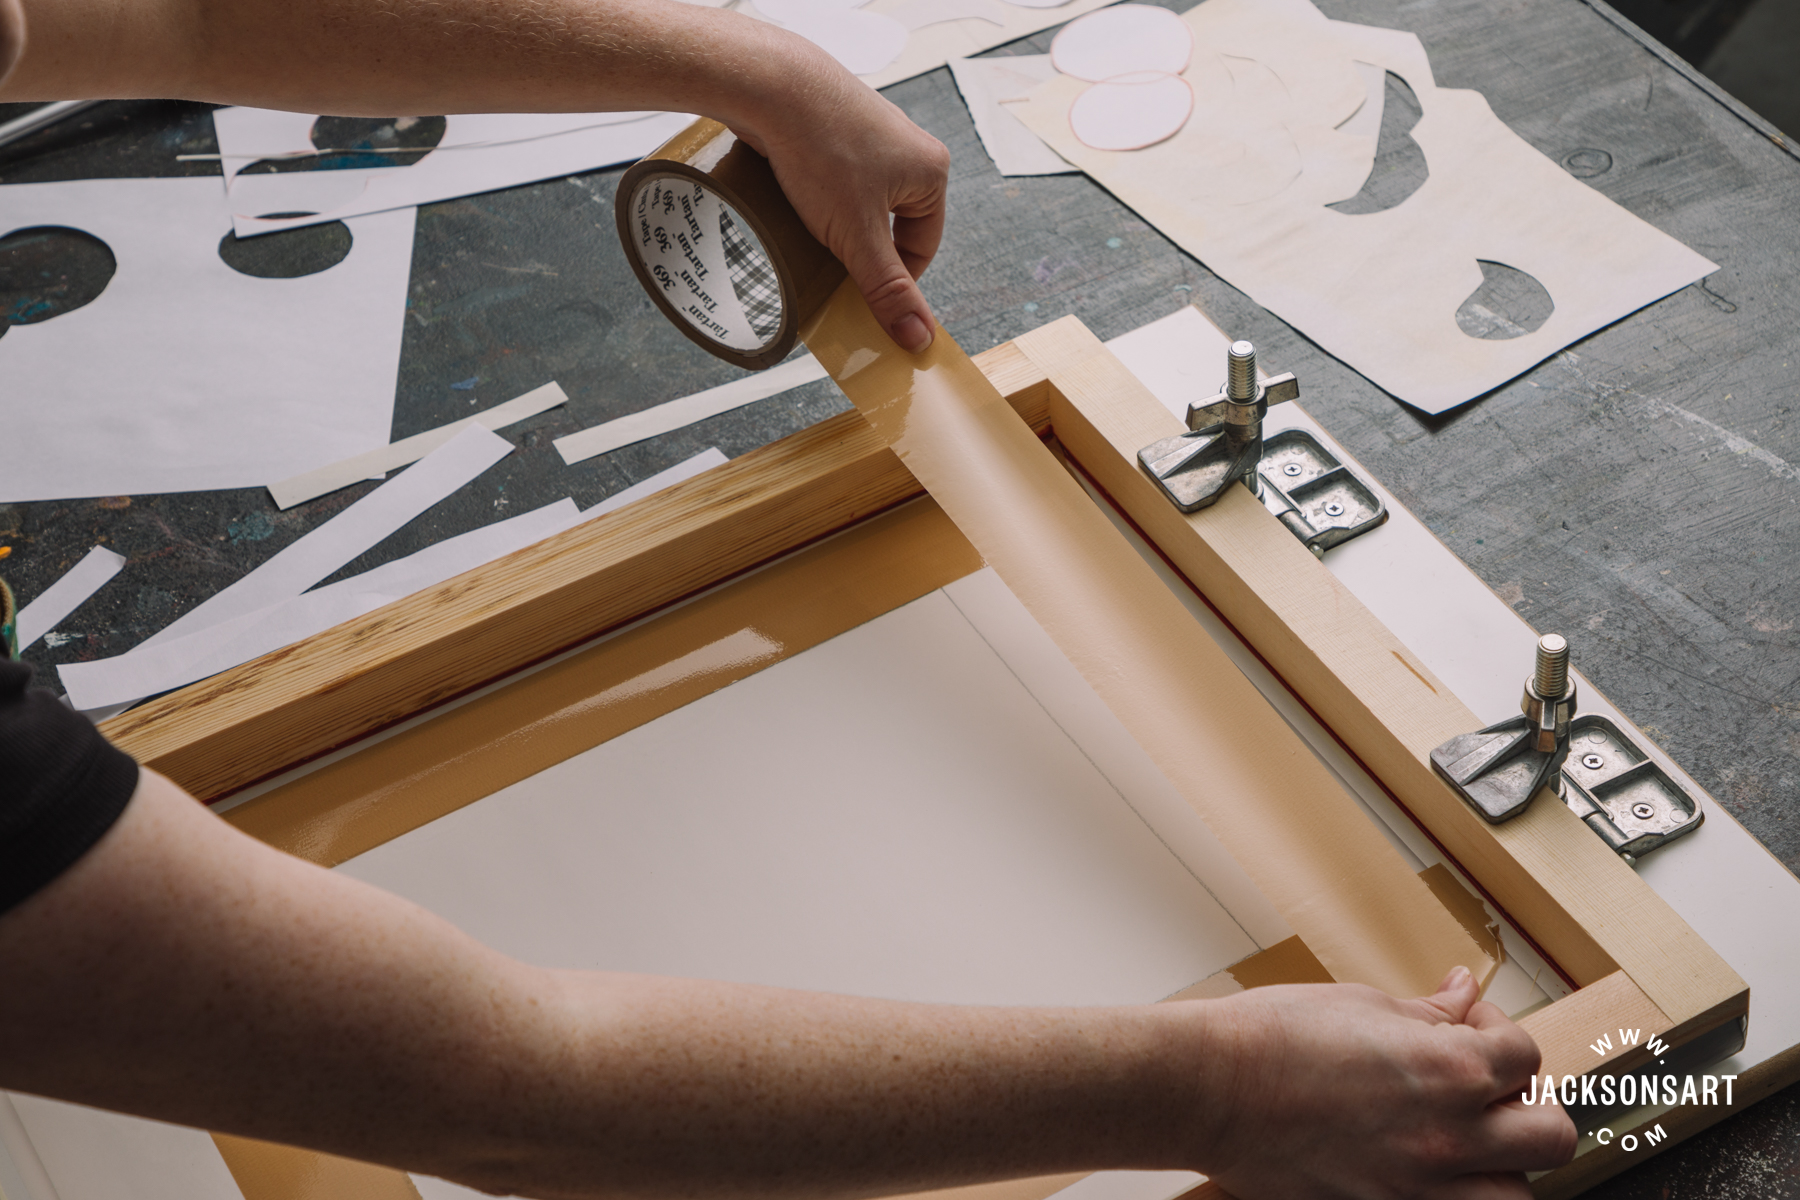
Next, it is truly worth taping the edges of your screen with parcel tape, or particular ‘blue’ tape for this purpose. This is finished to the again of the display screen and correctly presents a border that helps prevent the newsprint stencil from accomplishing all the really hard do the job. The tape is a water resistant mask for the edges of your print. It is truly worth taping ideal up to the edges of the printing area, and then remembering to clear away this tape when your impression is concluded. If you go away the tape on the screen for weeks on stop the glue might start off to clog the mesh.

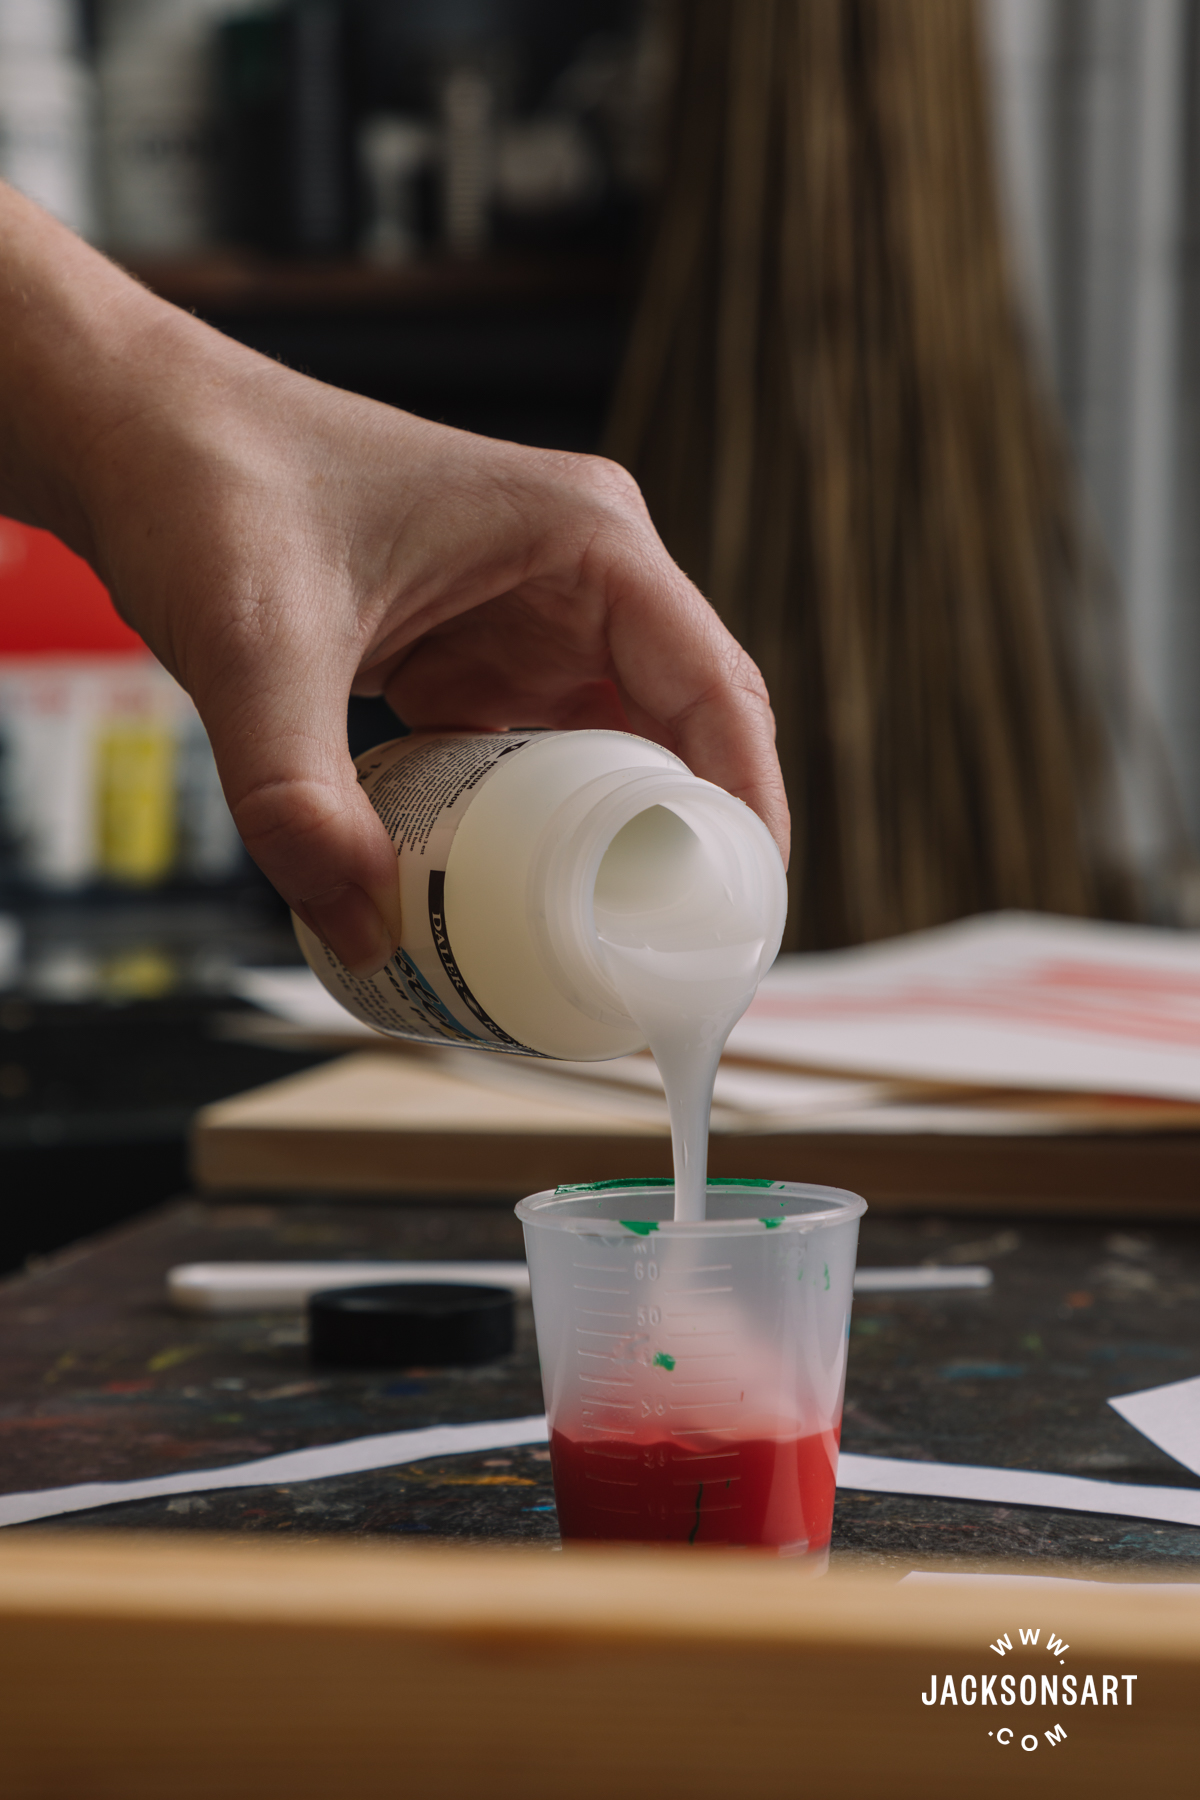
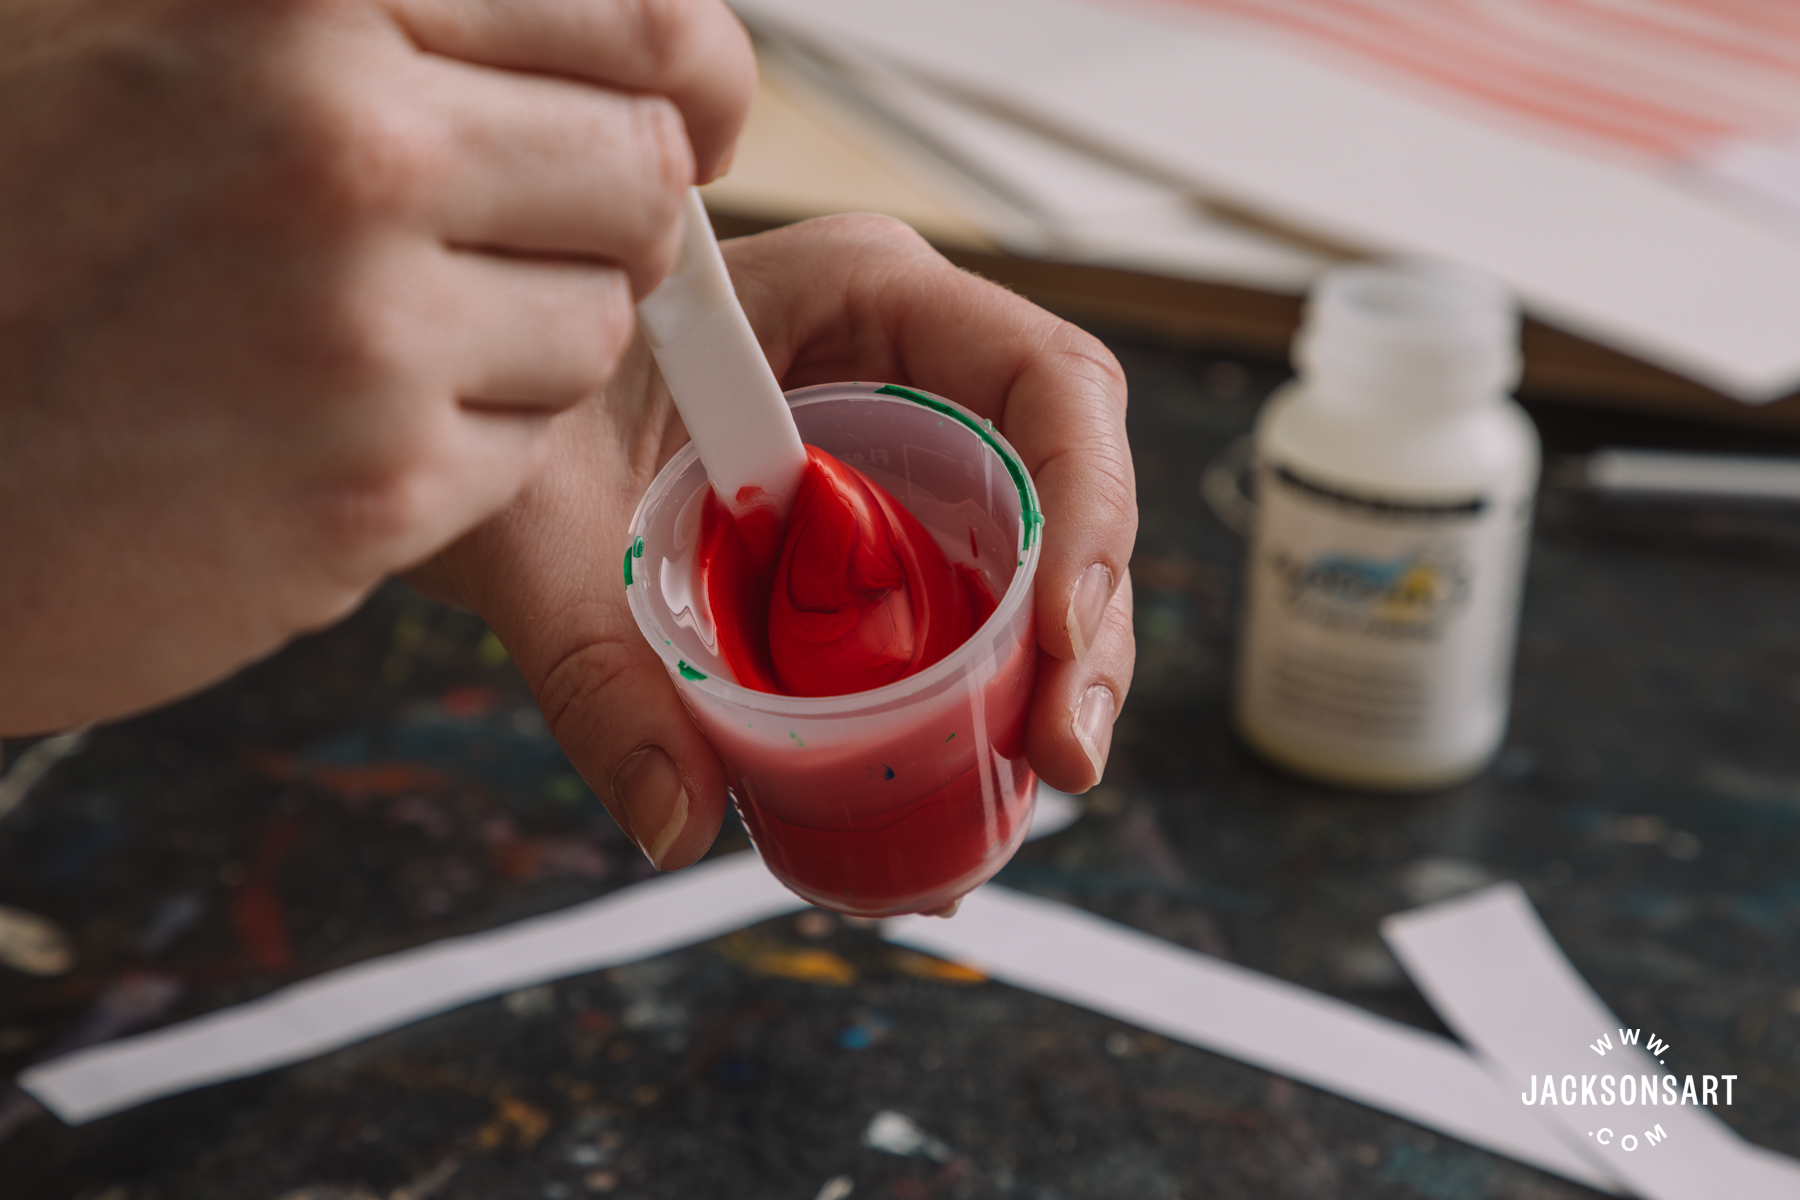
Make certain you are working with the appropriate medium (i.e. for paper alternatively than material), and combine totally so the ‘ink’ is constant during. It is excellent to continue to keep your ink in an airtight pot in case you have to have it at a afterwards date. If you have to have it to keep wet for a few times or even months, you could possibly want to also increase some retarder to the formulation to sluggish the drying further more, while the screen printing medium will also slow drying to a degree.

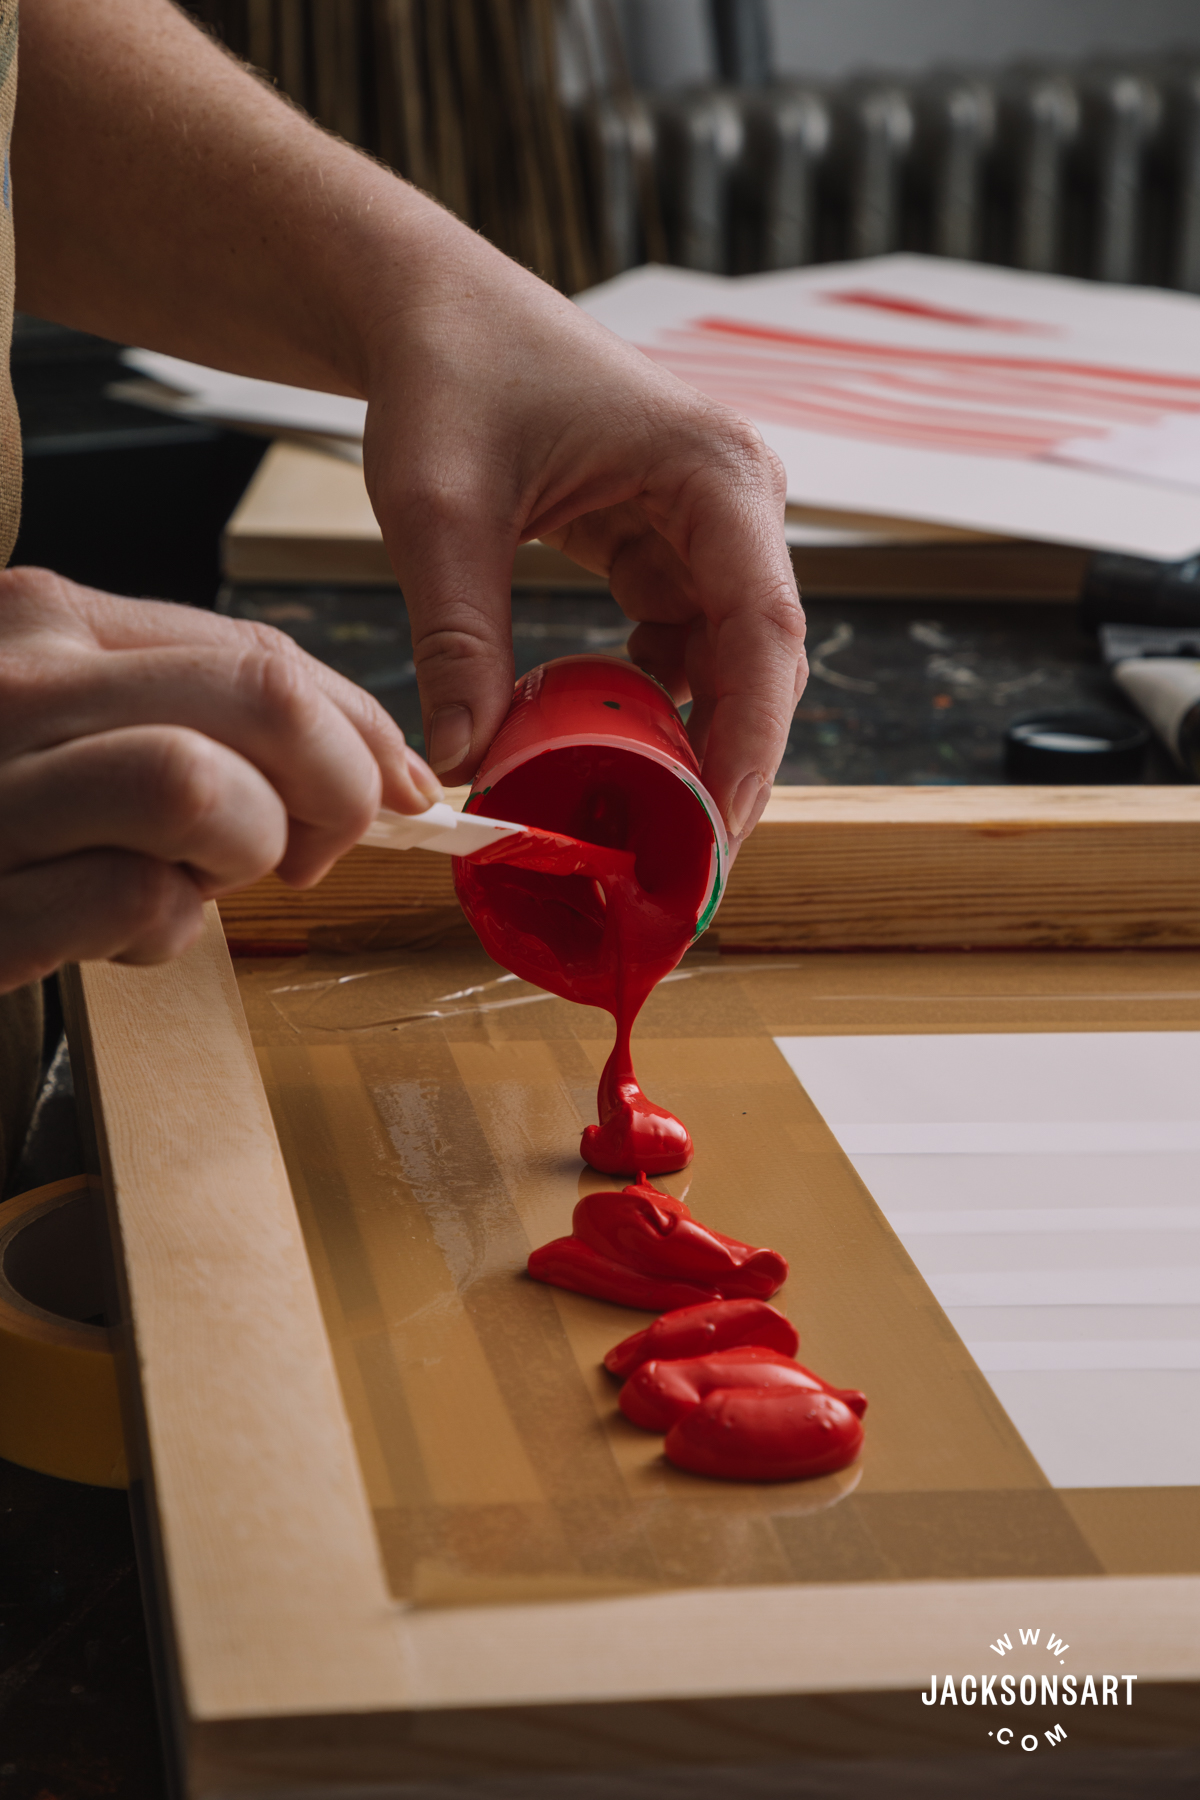
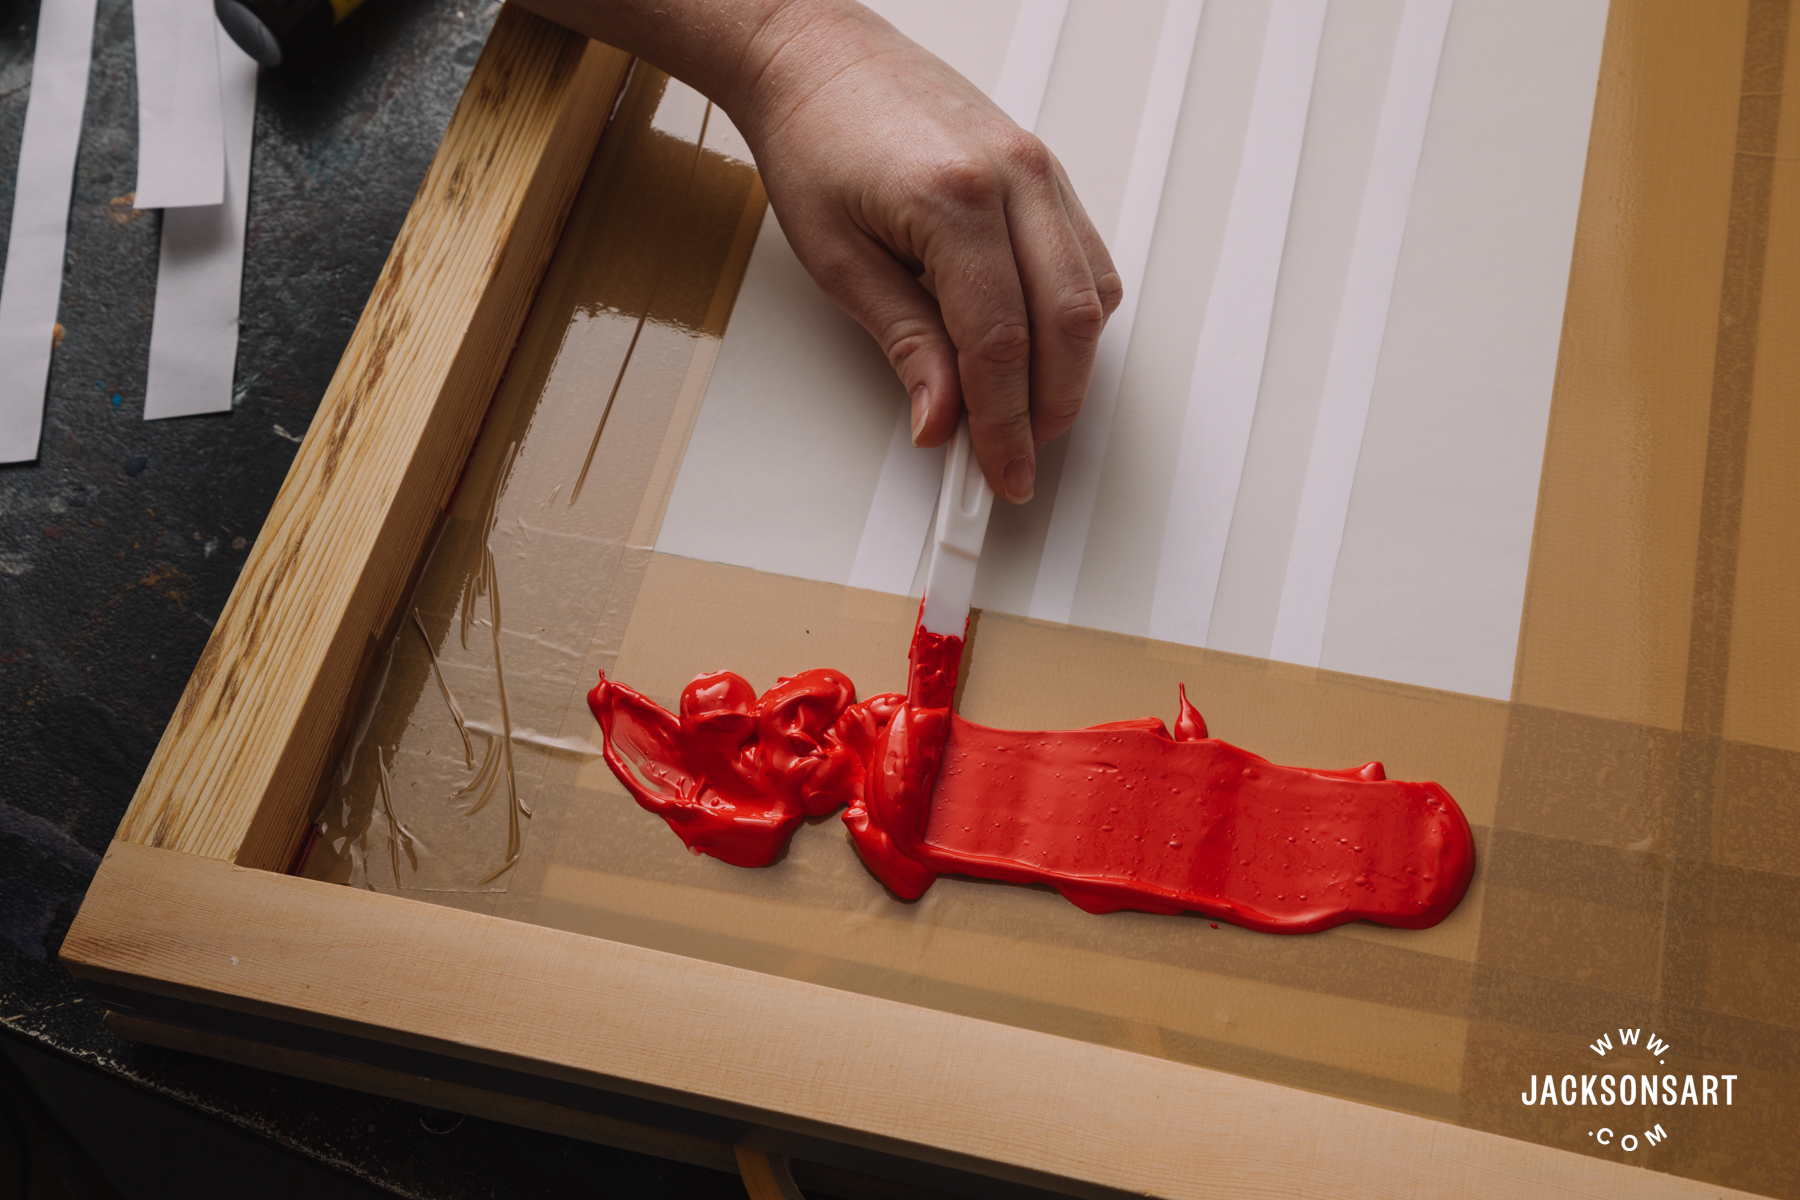
Following, you want to set a generous total of colour on the edge closest to you, an even strip of color together the edge of the width of the graphic area. Area the color on the tape to make guaranteed it does not leak through to your paper just but.
Then, you need to put some thing in among the screen and the board to guarantee the display screen is lifted although you flood the monitor. A roll of masking tape is great!

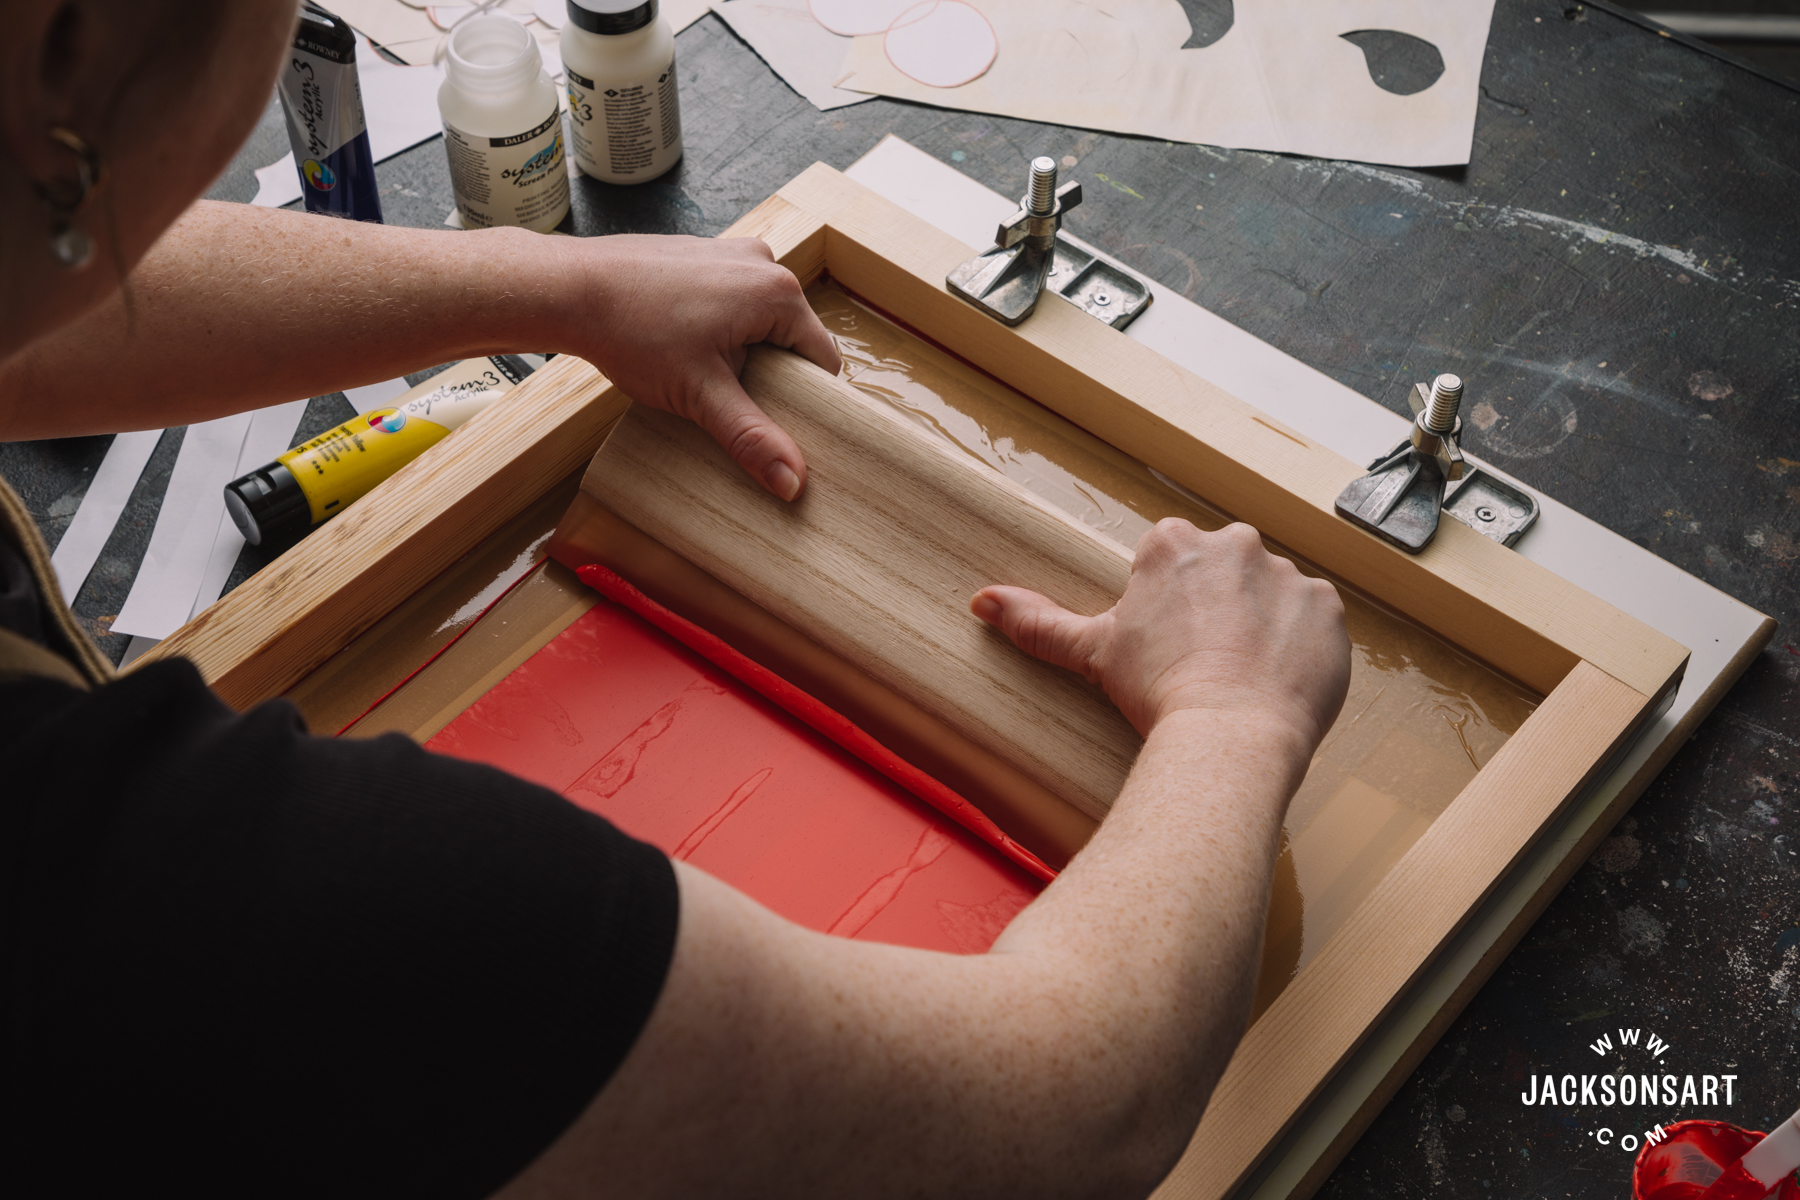
Flooding the display screen is the course of action of keeping the squeegee to the display screen and transferring it in a wiping motion from bottom to major of the screen, depositing ink evenly across the mesh. It will take observe to produce a approach to do this correctly throughout the display, but I have located speed aids, with only a very little downward tension on the screen. It also can help to maintain the squeegee at a far more upright angle to the screen not very 90 levels, but practically, holding the squeegee at an angle a bit away from you. For a little image such as this it isn’t definitely essential the monitor is totally flooded, but it does support with an even deposit of color when you truly go to pull your print. As soon as you have flooded your monitor you can then pull a print. It is generally finest observe to flood the display straight right after pulling a print as this can help to quit ink drying in the mesh.
The moment the display has been flooded with colour, you can then pull your to start with print. Don’t forget to take away the masking tape or other object keeping the display screen up! You want to maintain the squeegee with equally fingers, pushing downwards with the identical quantity of strain, and with some speed, pull the squeegee towards you at a 45 degree angle. This will thrust the ink that is flooding the mesh down on to your paper.

Once you have pulled your print you can elevate the monitor and see how the layer of color has printed. If there’s any unwanted gaps you could try out squeegeeing the screen again. When you are satisfied you can take out the print from the board and put it someplace to dry. Then put your masking fluid/item in between the board and the edge of your display frame and flood the display screen completely ready to pull your following print.
Hopefully pulling the print will have pushed ample ink through the monitor to act as an adhesive for the stencil, which really should then stick to the underside of your monitor and hold it in spot for the rest of your prints.
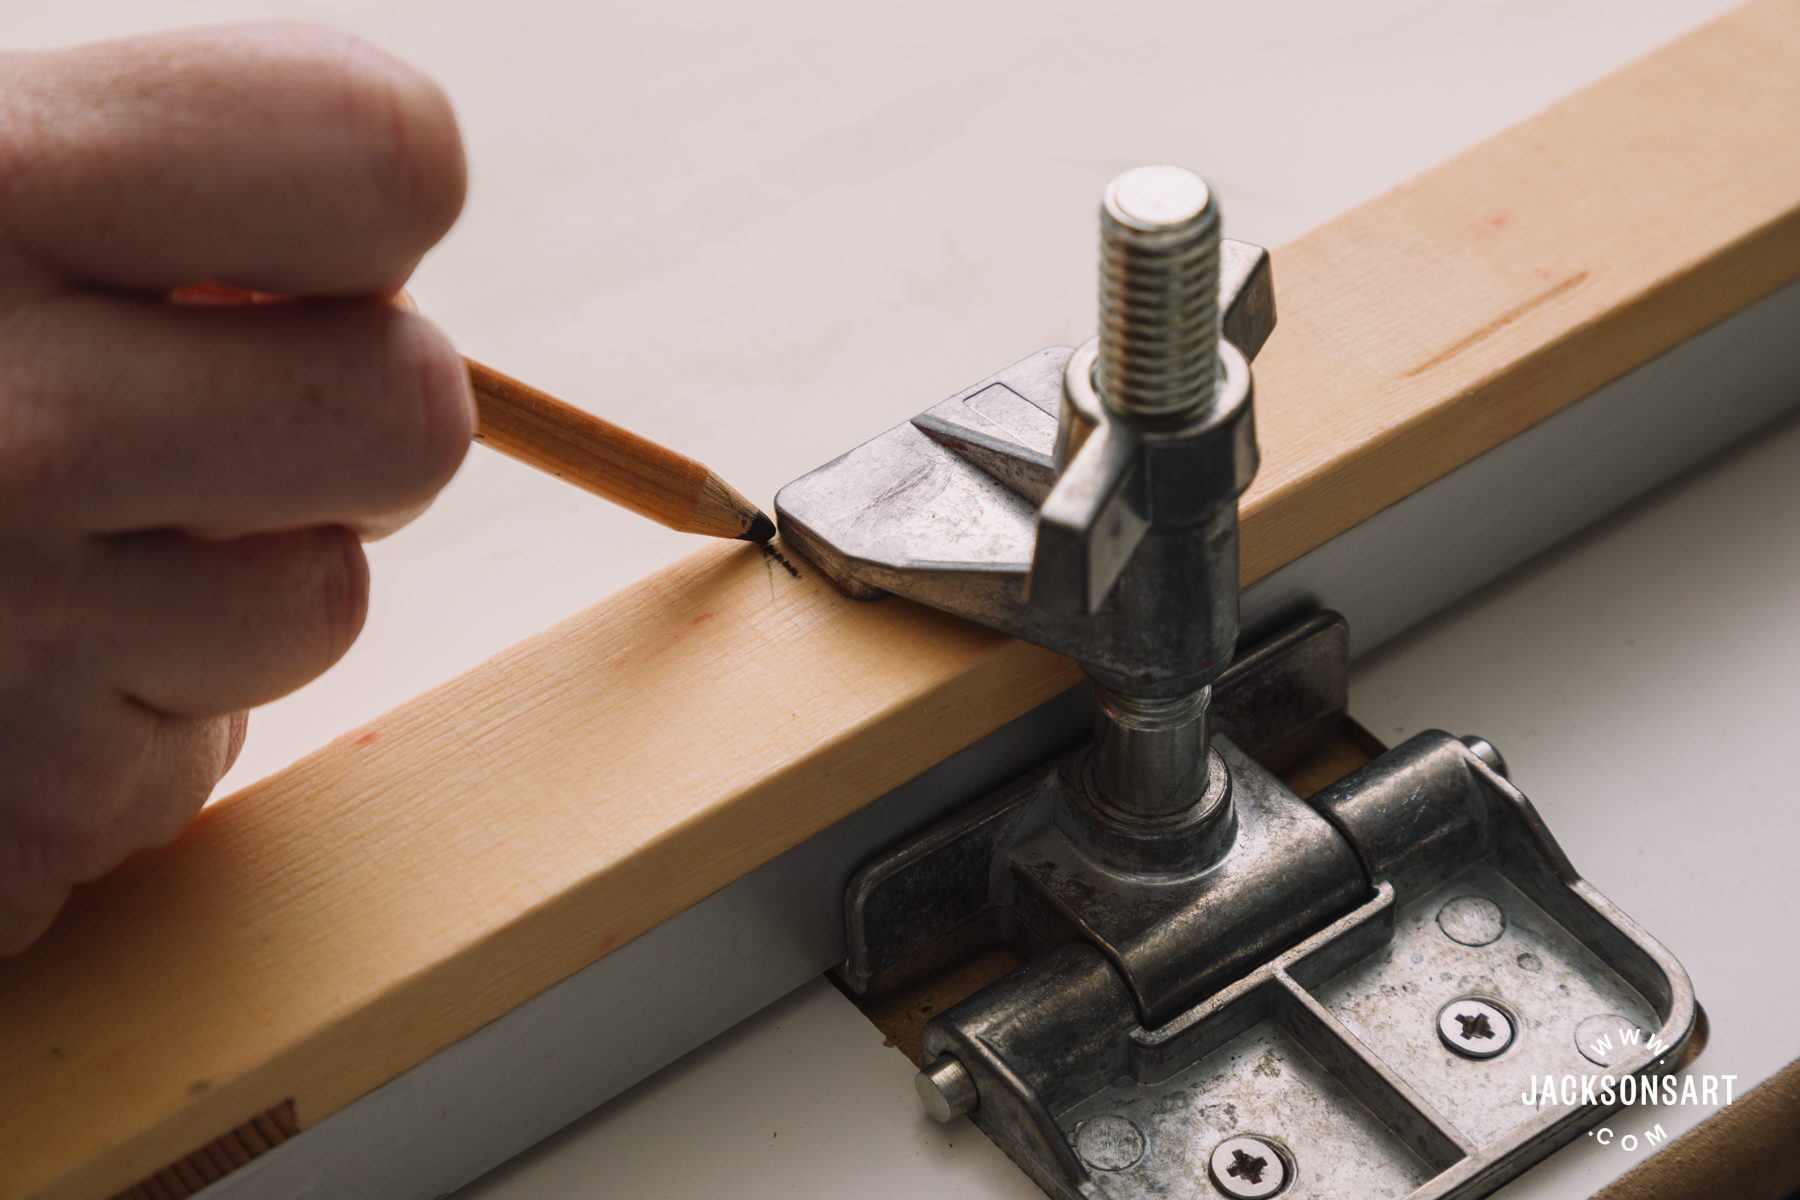
You may want to use a chinagraph or All Floor pencil to mark on the screen frame exactly where the hinges are attached, as this could support come across the suitable position for the next levels for the print to realize fantastic registration.
When you have printed all your initially levels, scoop up as a great deal of the remaining ink and set it back again in your pot. It’s finest to clean your display as speedily as achievable to keep away from the ink clogging up the mesh. If you do it shortly adequate, you must be equipped to clear the monitor just with drinking water and a clear sponge, but if that does not do the career, you can use a scrubbing brush and a small washing up liquid. Test and retain the parcel tape in which it is.
Enable all your machines to dry totally (and your prints!) prior to functioning on the next layer.
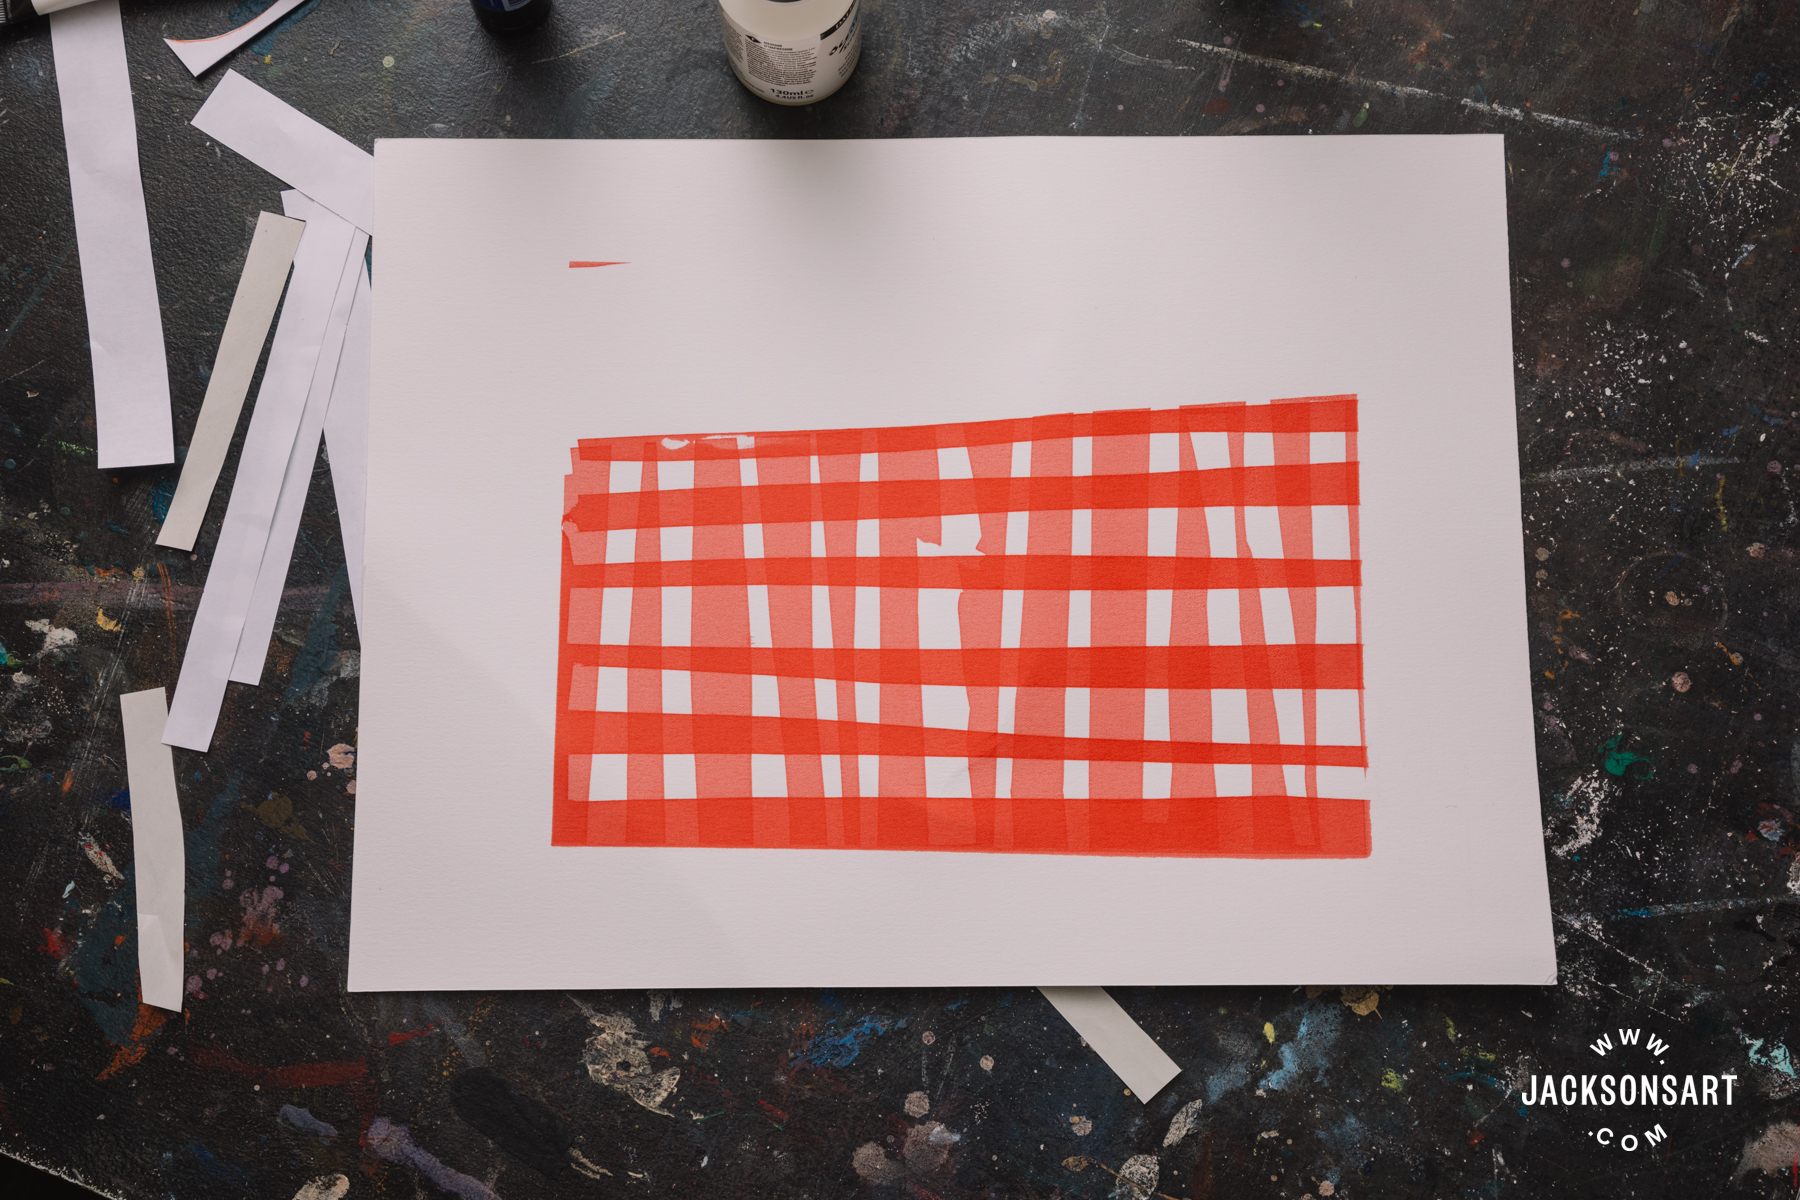
When all the prints are dry you can slice your upcoming stencil. As my goal was to print a gingham tablecloth, my next stencil consisted of strips of newsprint placed vertically across my horizontal stripes.

You then require to place your print with the new stencil placed on leading inside of the registration rules and position the monitor back again in the hinge clamps so the print is seen via the parcel tape border.
Then it is merely a circumstance of repeating the printing system, flooding then pulling the print, guaranteeing there is a thing holding the display screen away from the board and paper when you flood the display screen each individual time.
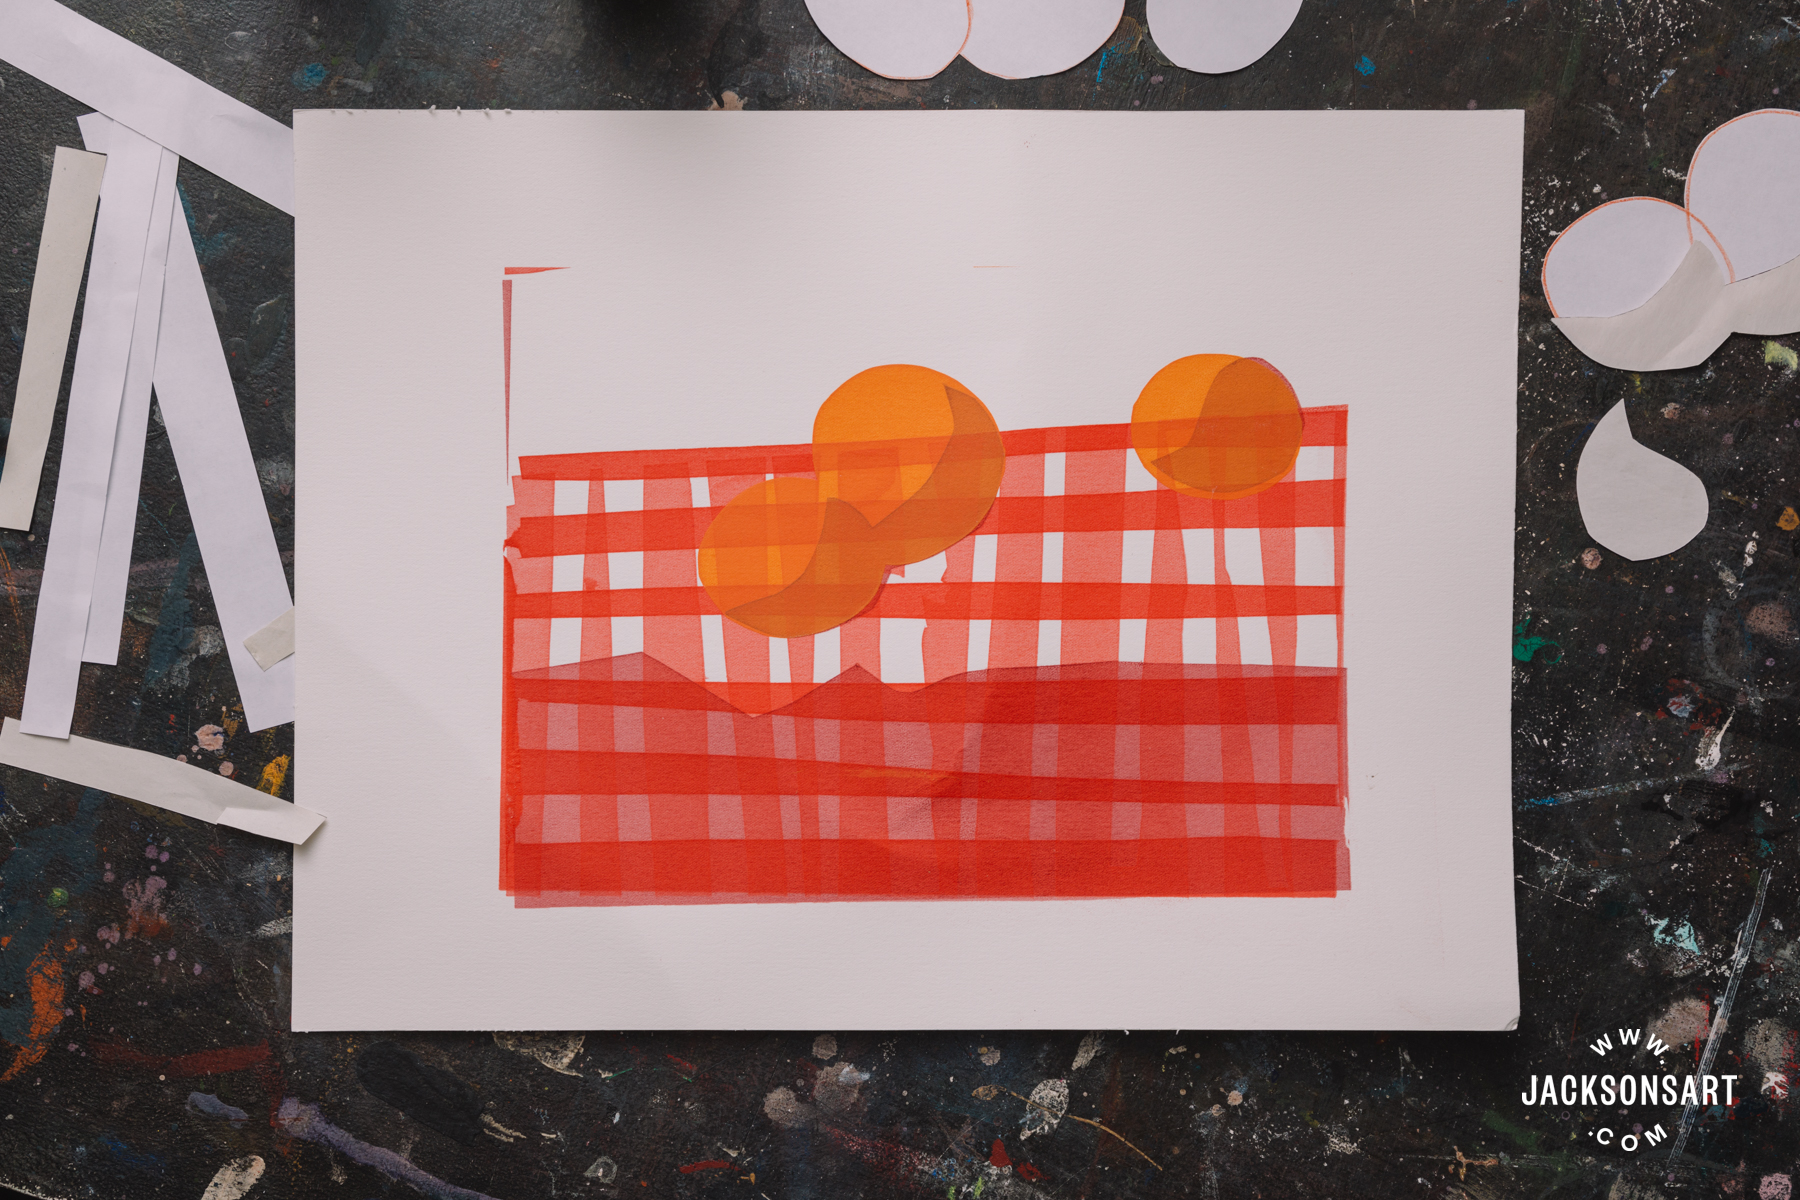
The more medium there is extra to the ink, the far more transparent the colour will appear, so you can see exactly where the layers overlap in the print at this stage – the overlapped locations seem darker. There is no limit to the quantity of medium you can include to the ink, but it is ideal to generally have much more medium than paint in the ink.
Further more Levels
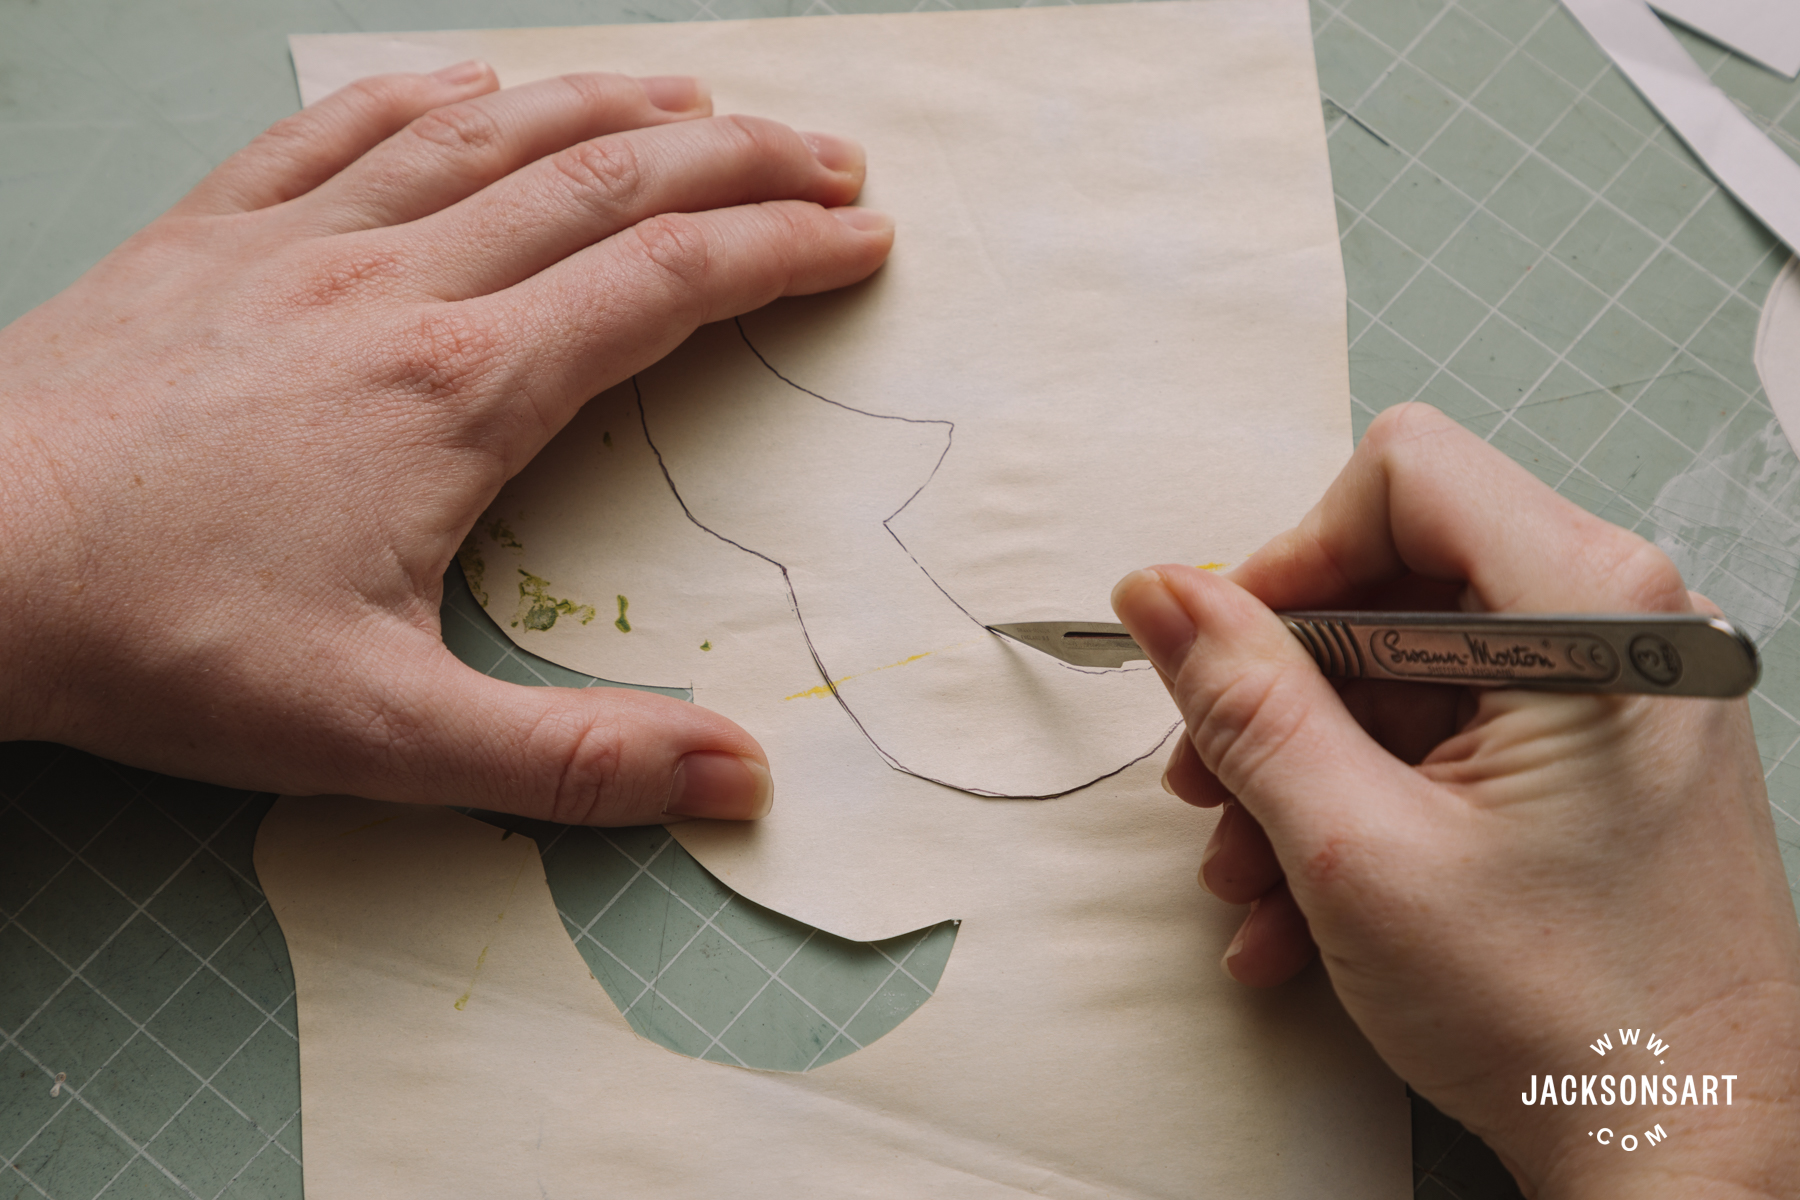
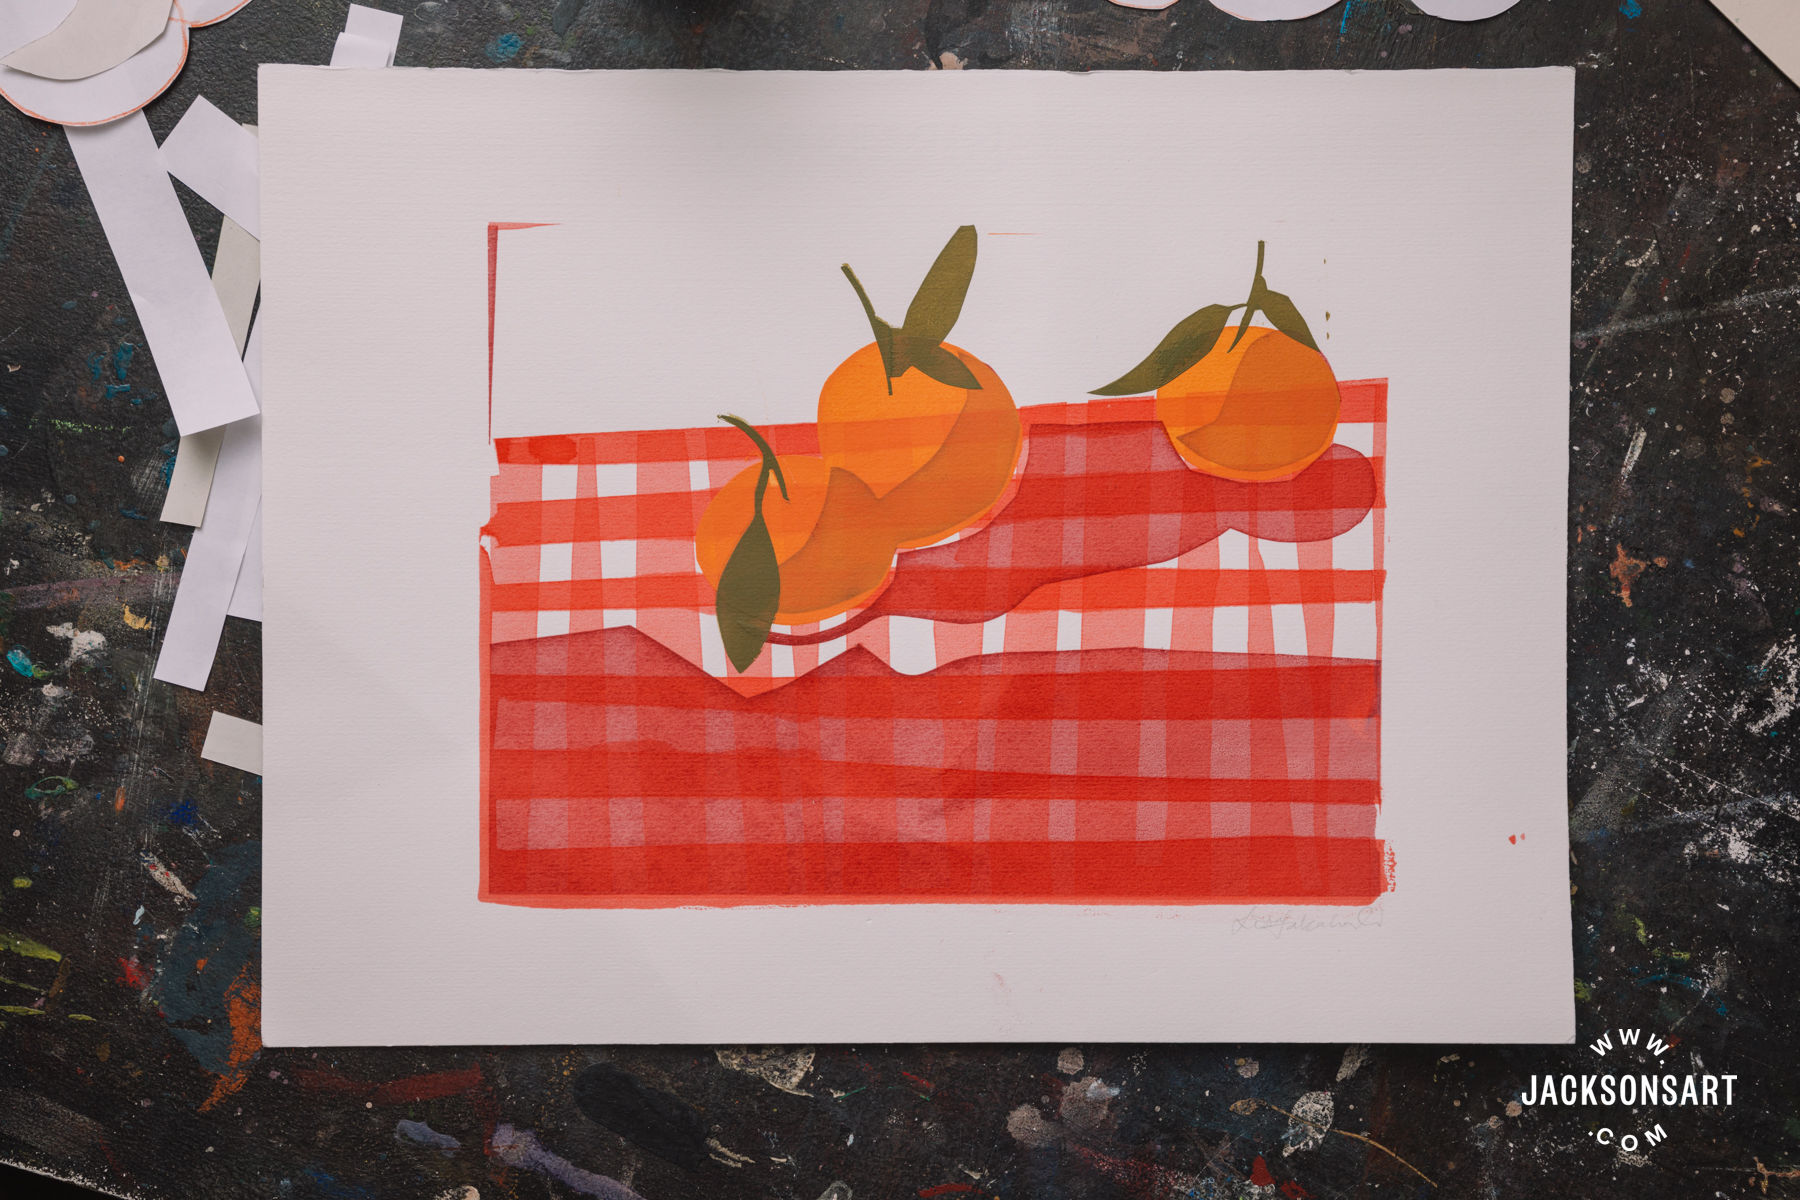
For the upcoming layers I wanted to print my fruit on the desk, and the shadows they solid. You might uncover at a variety of phases that tracing paper is helpful for putting on the image so far and mapping out wherever the future layers need to go. You can then area your drawing deal with down on to a new sheet of newsprint and draw on the again of the strains to transfer the drawing, prepared to slash with a scalpel. Or you could use carbon paper.
The method is repetitious for each and every layer of colour, of cutting out stencils from newsprint, positioning them exactly where you want the graphic to be masked, mixing your color, adding screenprinting medium, putting it on the bottom edge of the display screen ahead of flooding the screen and pulling a print. Try to remember to constantly wash the screen as soon immediately after as attainable, scooping up as substantially excessive ink as you can with a palette knife. The color can very last for months in an airtight container, and if you do need the ink to remain wet for a even though you can usually add some acrylic retarder to it. When you have ultimately completed your print eliminate the parcel tape before long right after and give the whole display a very good scrub with h2o and washing up liquid to make positive it’s totally free of ink and all set for your next screenprint edition.
When you first begin out with screen print, preserve the impression compact and straightforward, with just a number of layers. I endorse doing work with stencils to start off with as the thoroughly clean up method is rather straightforward, and it’s feasible to make anything easy and bold fairly quickly. Once you make self-assurance by creating a several prints like this, you may well really feel inclined to perform on a larger scale and maybe even make investments in a more substantial display.
More Studying
Screenprinting With Dave Buonaguidi AKA Actual Hackney Dave
Screenprinting With Screentec Aqua Artwork Water Based mostly Display screen Ink
A Manual to Inks
Screen Printing With Jackson’s Studio Acrylic Paint
Shop Screenprinting at jacksonsart.com